Japan Clickable Map turns a plain map of Japan into a navigation element. You build a map in the WordPress admin, then place it in any post, page or custom post type with a shortcode or a block. It is distributed free on WordPress.org — there is no purchase step and no license key.
This page documents version 1.0.1.
Overview
The map is rendered as inline SVG on your own server. There is no external map service, no API key and no JavaScript library, and the plugin makes no outbound HTTP requests at all. The front end only ships a script when a map actually uses region popovers.
What it does
- Show all 47 prefectures, or only the prefectures you pick
- Set a color and a link target per prefecture, or per region
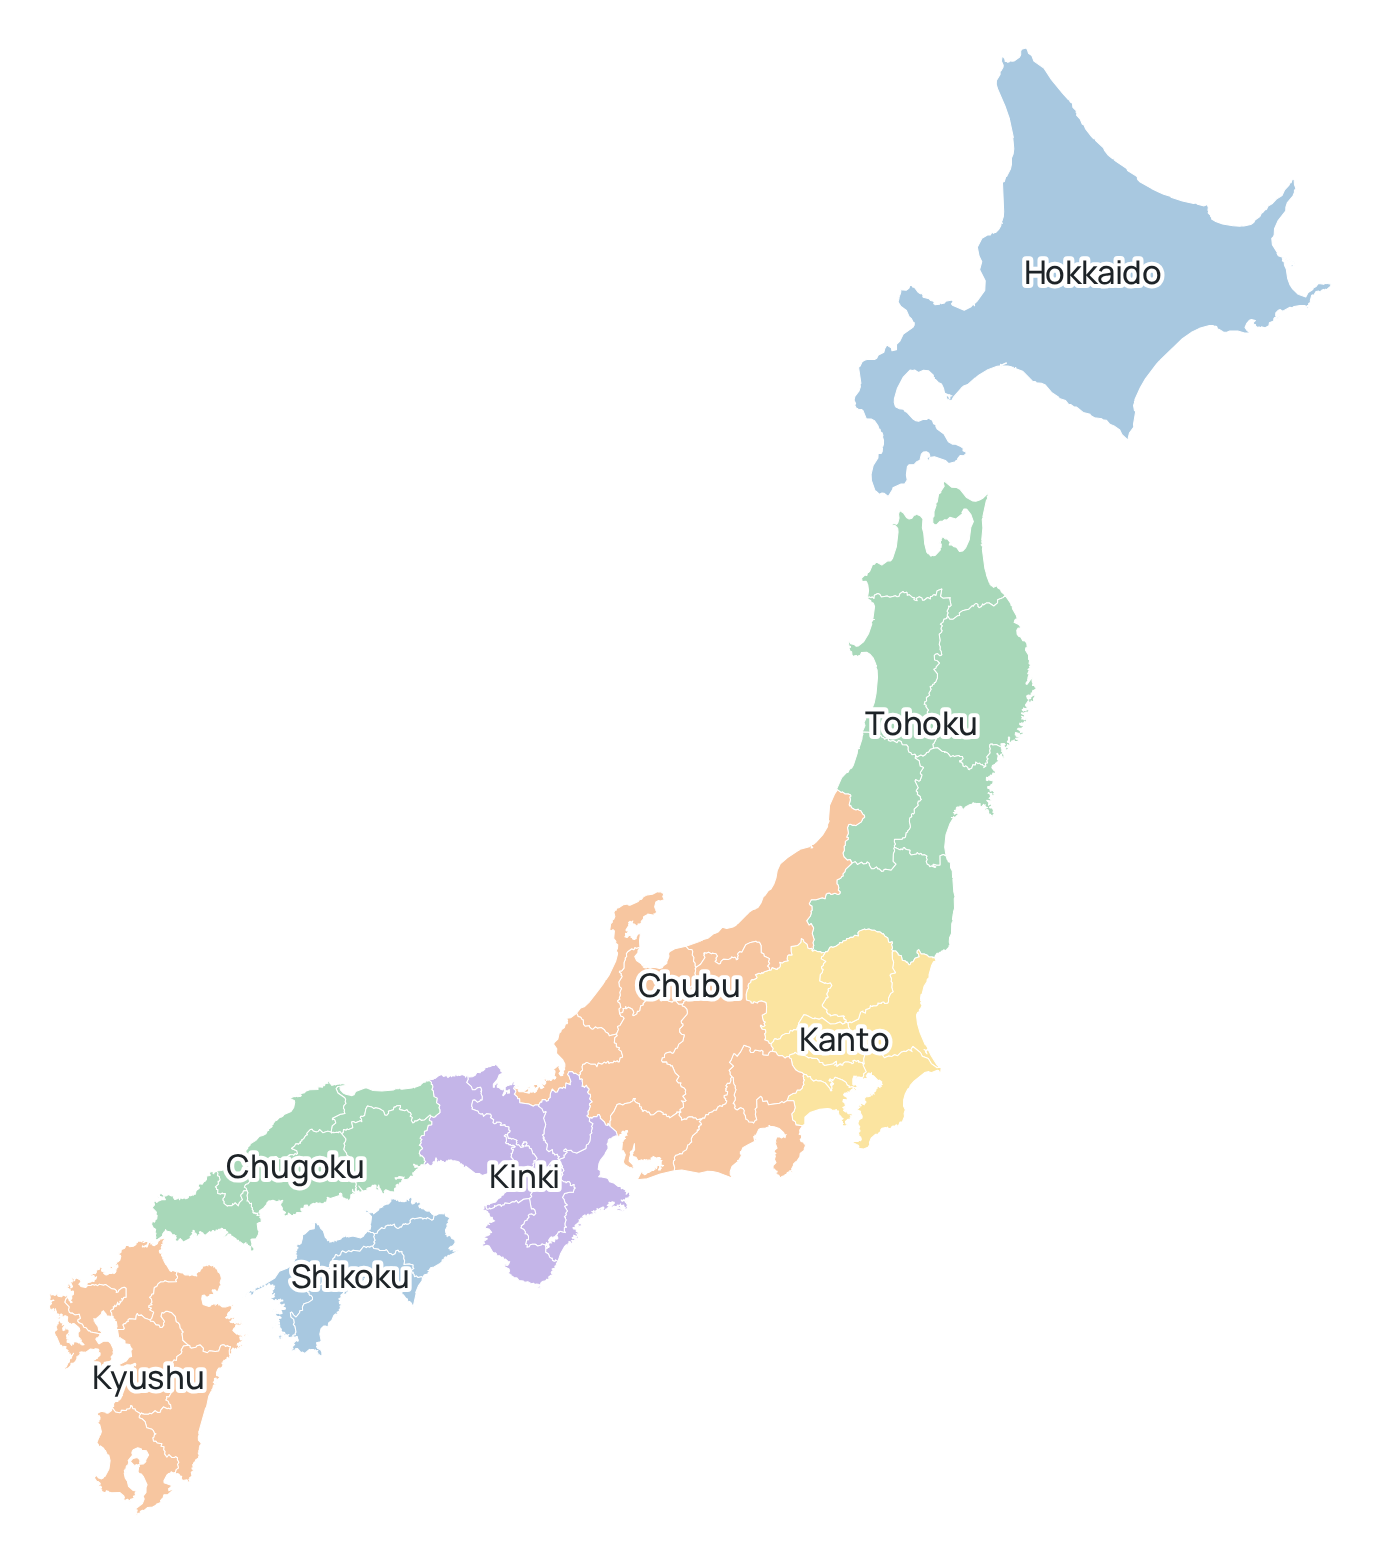
- Group prefectures into regions — Japan’s standard eight, or your own grouping
- Make a region link straight to a URL, or open a popover next to it
- Choose link targets by searching your site instead of typing URLs (posts, pages, custom post type entries, taxonomy terms)
- Draw prefecture and region names on the map
- Save color palettes as presets and reuse them across maps
- Check the finished map in a preview modal without leaving the editor
Municipality-level maps — where the clickable areas are cities, towns and wards — are a paid edition feature. The free edition stops at prefecture level, but places no limit on how many maps you can build.
Requirements
| Item | Requirement |
|---|---|
| WordPress | 6.6 or higher |
| PHP | 8.1 or higher |
| Tested up to | WordPress 7.0 |
| License | GPLv2 or later |
The plugin runs on multisite. Note that in v1.0.1 the uninstall cleanup described below only covers the single site it runs on — it does not sweep the whole network.
Installing the plugin
- Search for “Japan Clickable Map” under Plugins → Add New, or upload the zip so
that it extracts to
/wp-content/plugins/japan-clickable-map/. - Activate it on the Plugins screen.
- A Clickable Maps menu appears in the admin sidebar.
The free and paid editions install into the same folder name, so they cannot both be active. If the free edition detects that the paid edition is active it does not load itself and shows a notice instead. The paid edition already includes everything the free edition does, so you can safely delete the free one in that case.
Quick start
Three steps:
- Go to Clickable Maps → Add New and give the map a title.
- On the Prefecture selection / overrides tab, check the prefectures you want, fill in link targets if you need them, and publish.
- Put
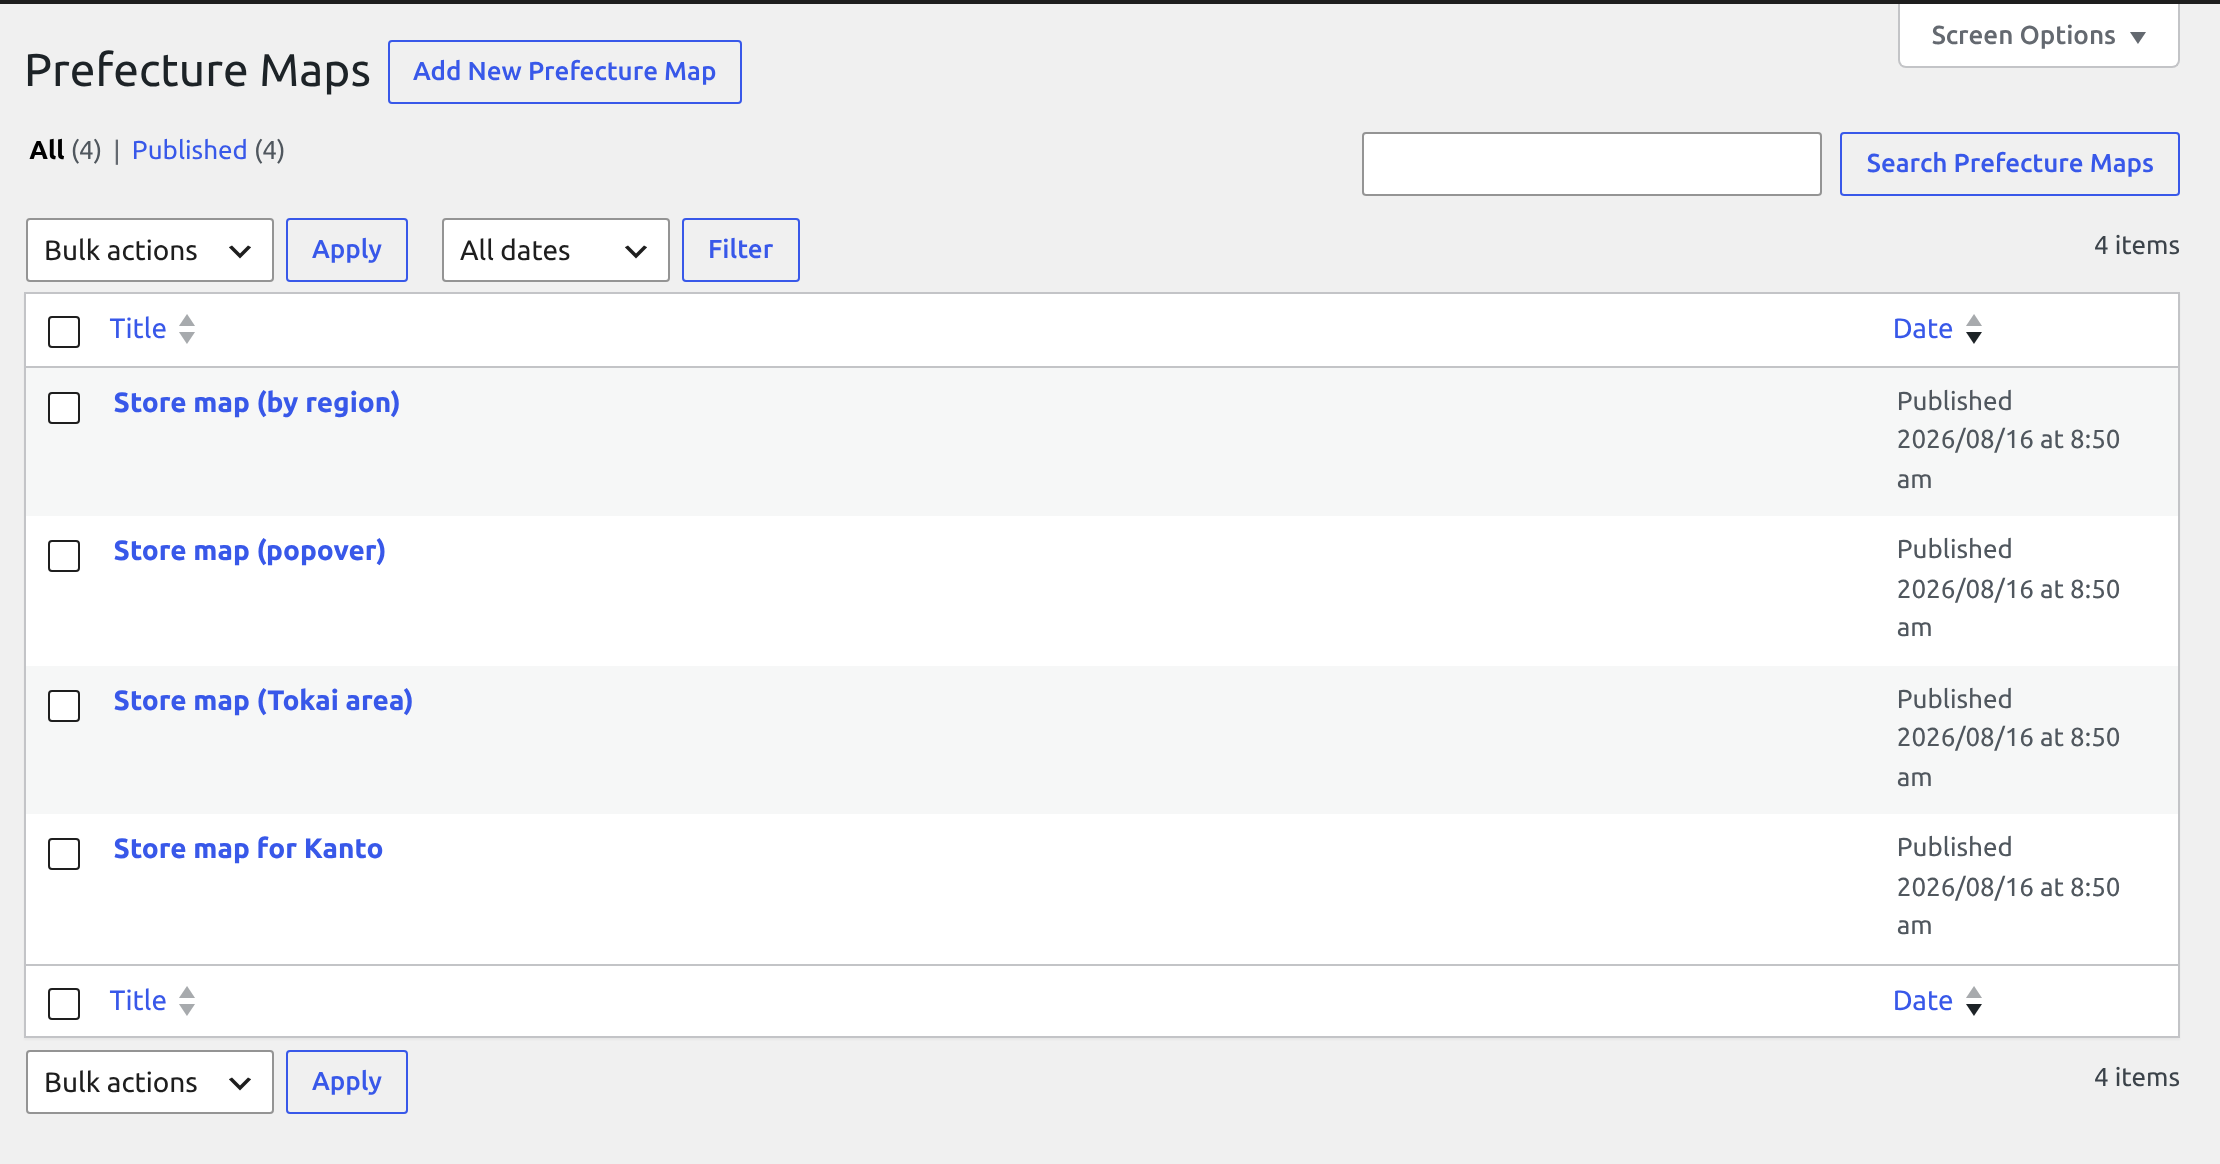
[plg_jcm_map id="123"]into a post or page, or insert the Clickable Map of Japan block and pick your map.
The id is the map’s post ID. You can read it off the edit screen URL:
…/wp-admin/post.php?post=123&action=edit.
The map editor
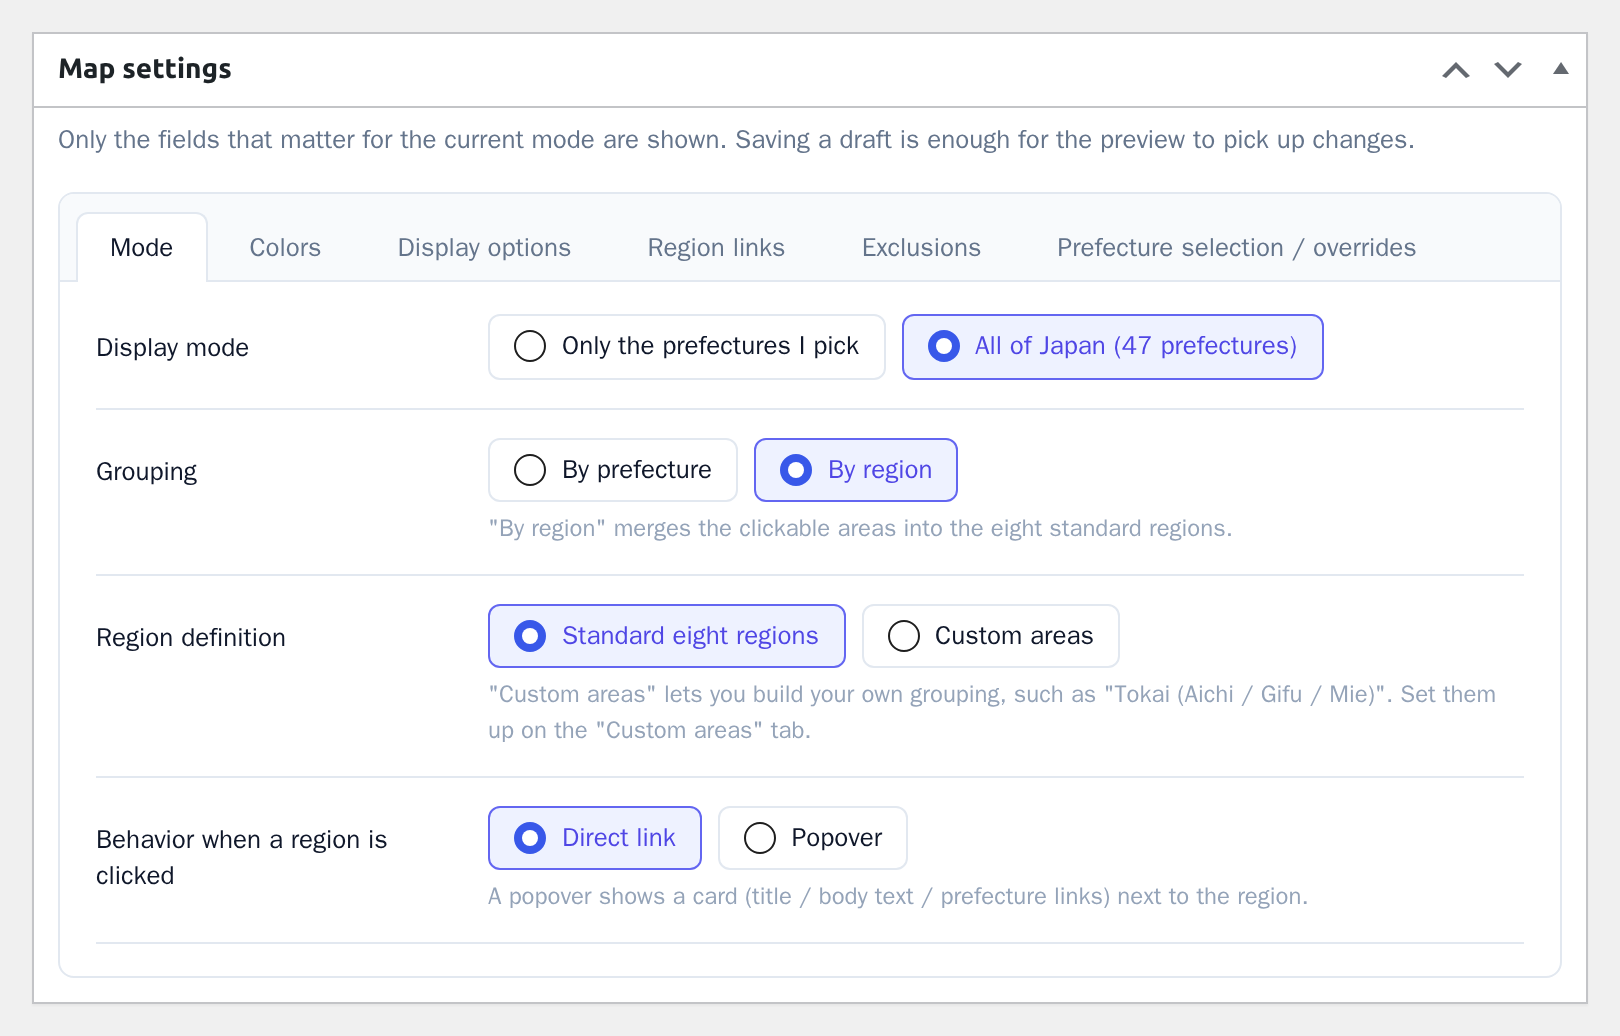
A map is configured through the eight tabs of the Map settings meta box plus the Output size box in the sidebar. Tabs that carry no meaning for the current mode are hidden, so you will not see all eight at once.
Saving a draft is enough for the preview to pick up your changes.
Mode
| Field | Options | Default |
|---|---|---|
| Display mode | Only the prefectures I pick / All of Japan (47 prefectures) | Only the prefectures I pick |
| Grouping | By prefecture / By region | By prefecture |
| Region definition | Standard eight regions / Custom areas | Standard eight regions |
| Behavior when a region is clicked | Direct link / Popover | Direct link |
| Popover trigger | Click / Hover | Click |
Everything from Grouping down appears only when the display mode is set to all of Japan. Grouping by region merges the clickable areas so that a click targets a region rather than a single prefecture. The standard eight regions are Hokkaido, Tohoku, Kanto, Chubu, Kinki, Chugoku, Shikoku and Kyushu.
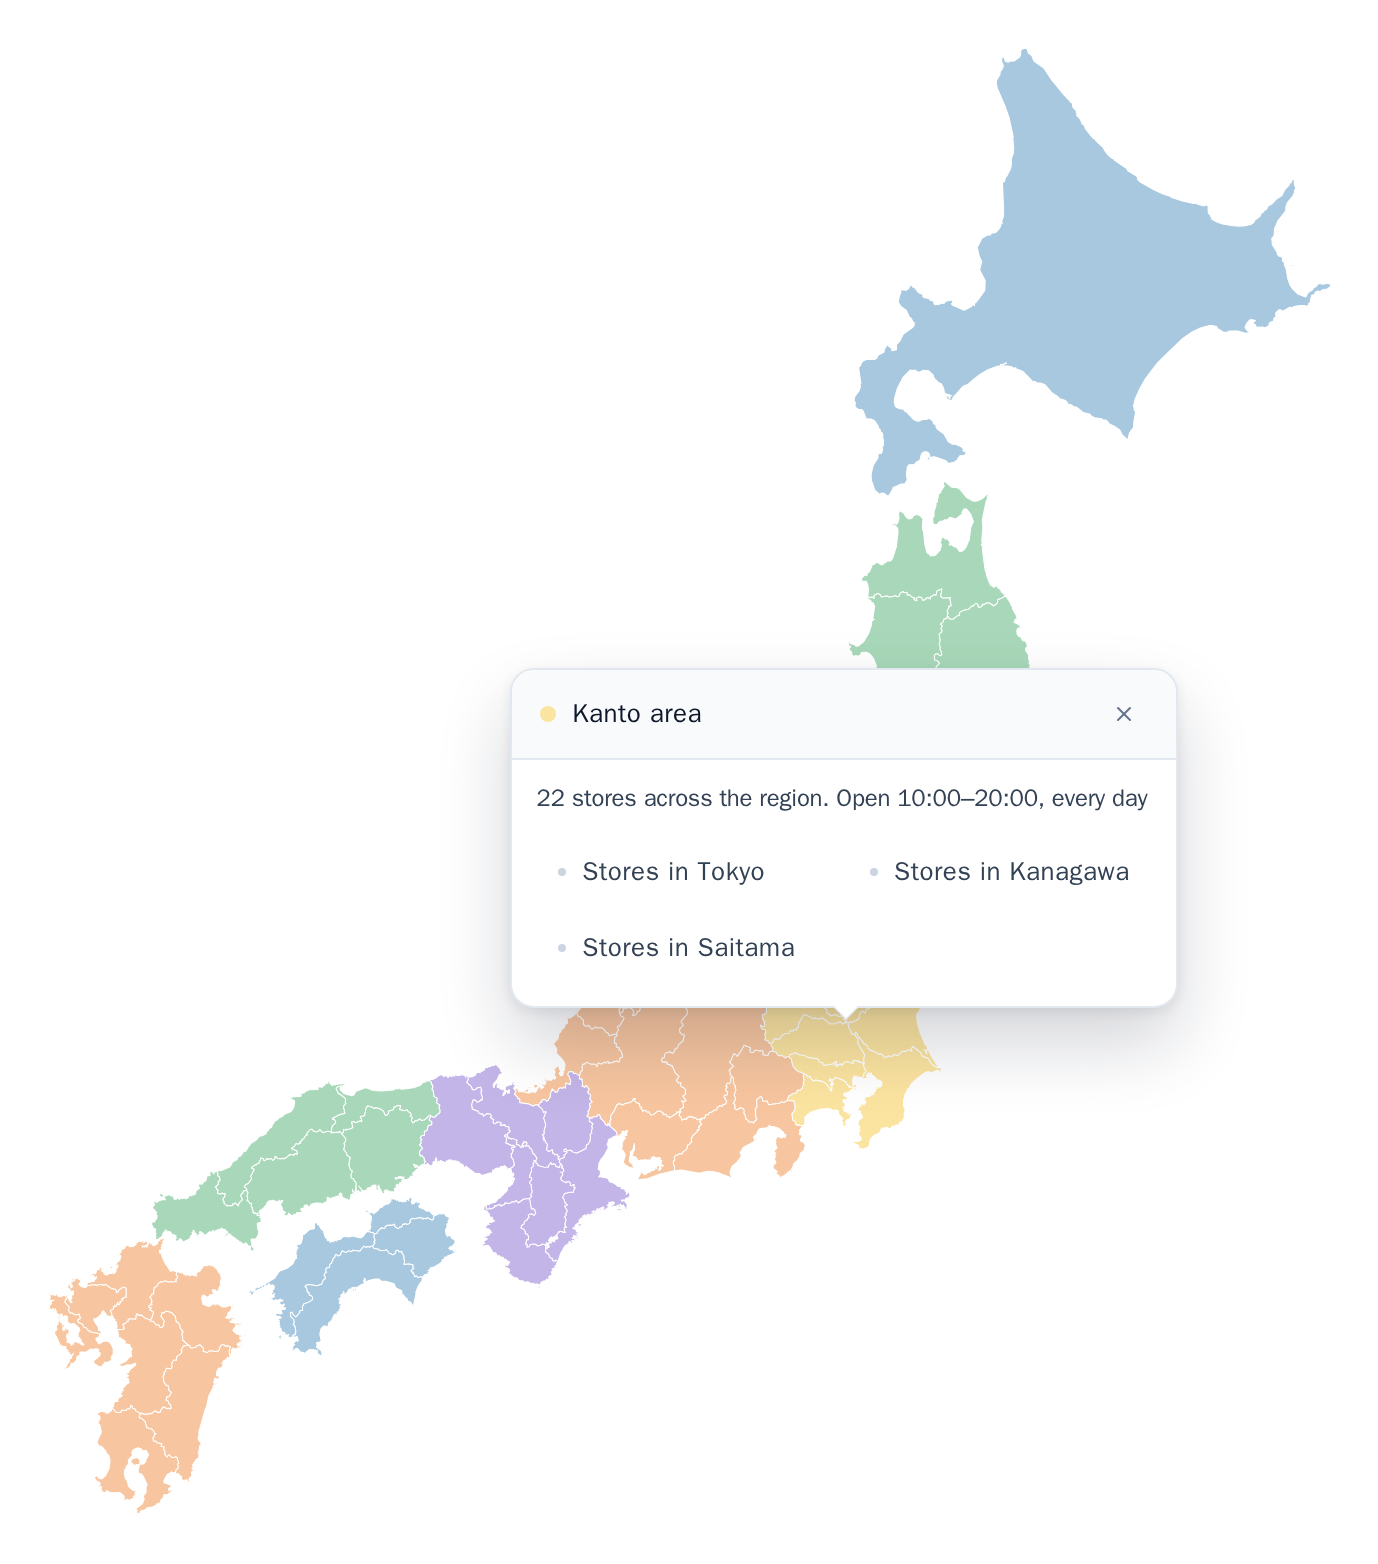
A popover shows a card — title, body text and links — next to the region. On touch devices, the hover setting is handled as a tap automatically.
Colors
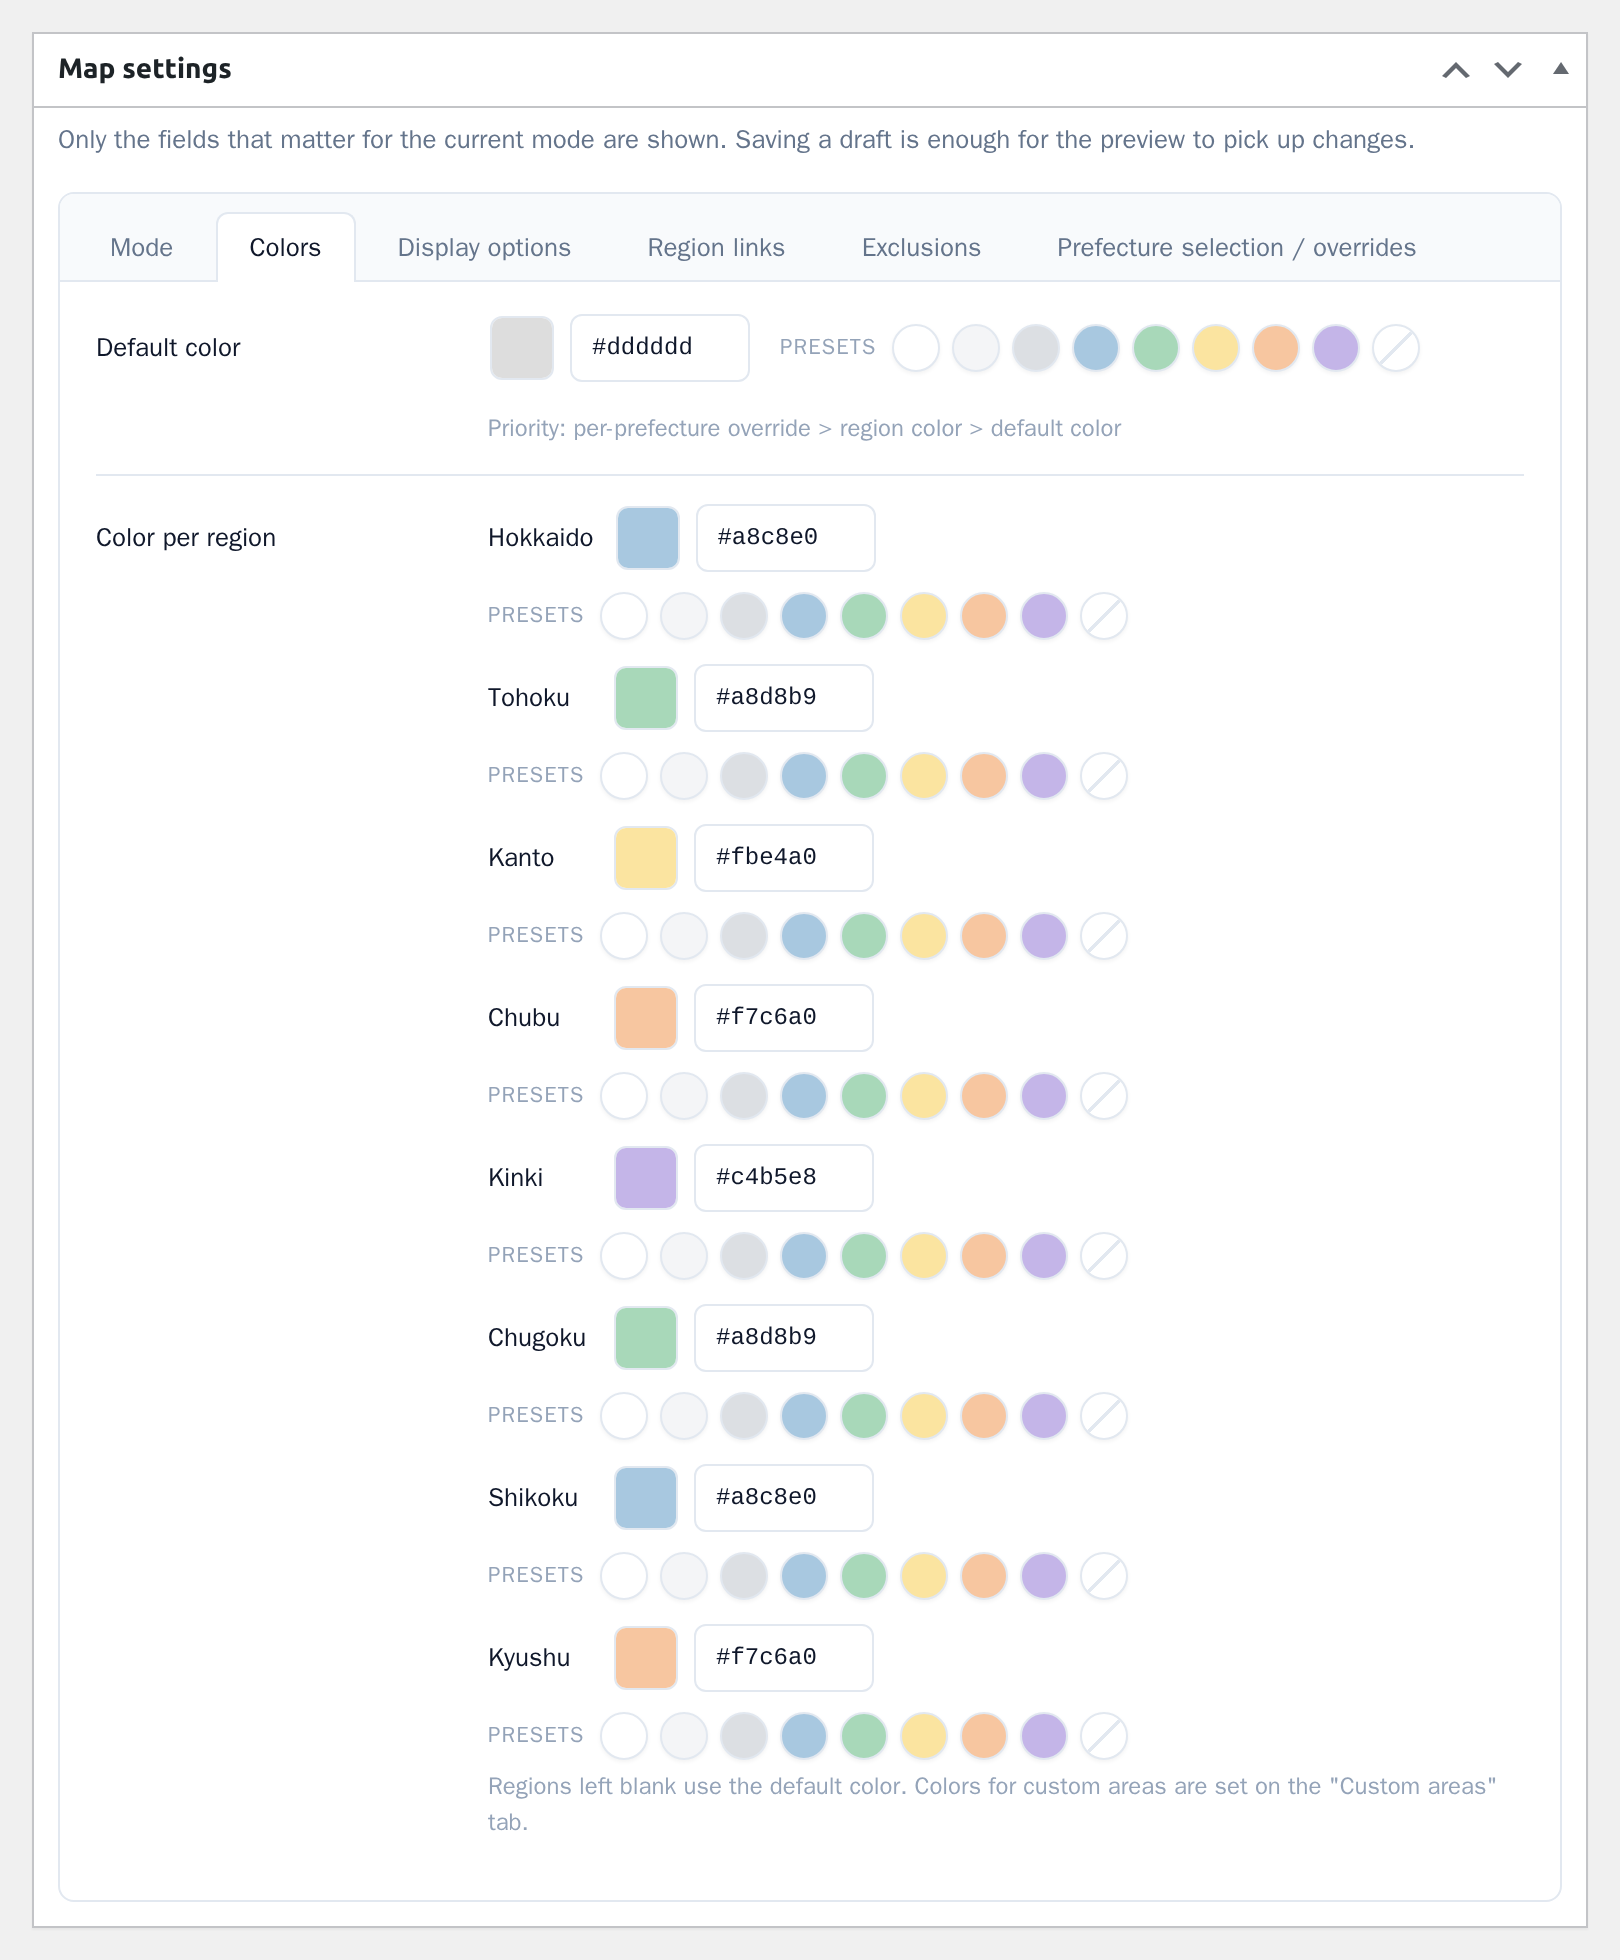
Set the fill for the whole map and, optionally, a color per region. The order of precedence is:
per-prefecture override > region color > default color
- Default color — the fill for the whole map. Defaults to
#dddddd - Color per region — one color per region. Regions left blank use the default color. Shown only for all-of-Japan + by region + standard eight regions
Colors for custom areas are set on the Custom areas tab instead. Your saved presets appear as swatches next to every color picker.
Display options
- Show prefecture names — draw prefecture names on the map (default: off)
- Show region names — draw region names (default: off). Shown only for all-of-Japan + by region
- Draw the outlying islands as well — default: on. Shown only when you are picking prefectures yourself
Names are toggled for the whole map; they cannot be set per prefecture.
Turning the islands off draws only the main island of each prefecture. Extremely small uninhabited islands are removed when the map data is built and do not come back with this toggle.
Custom areas
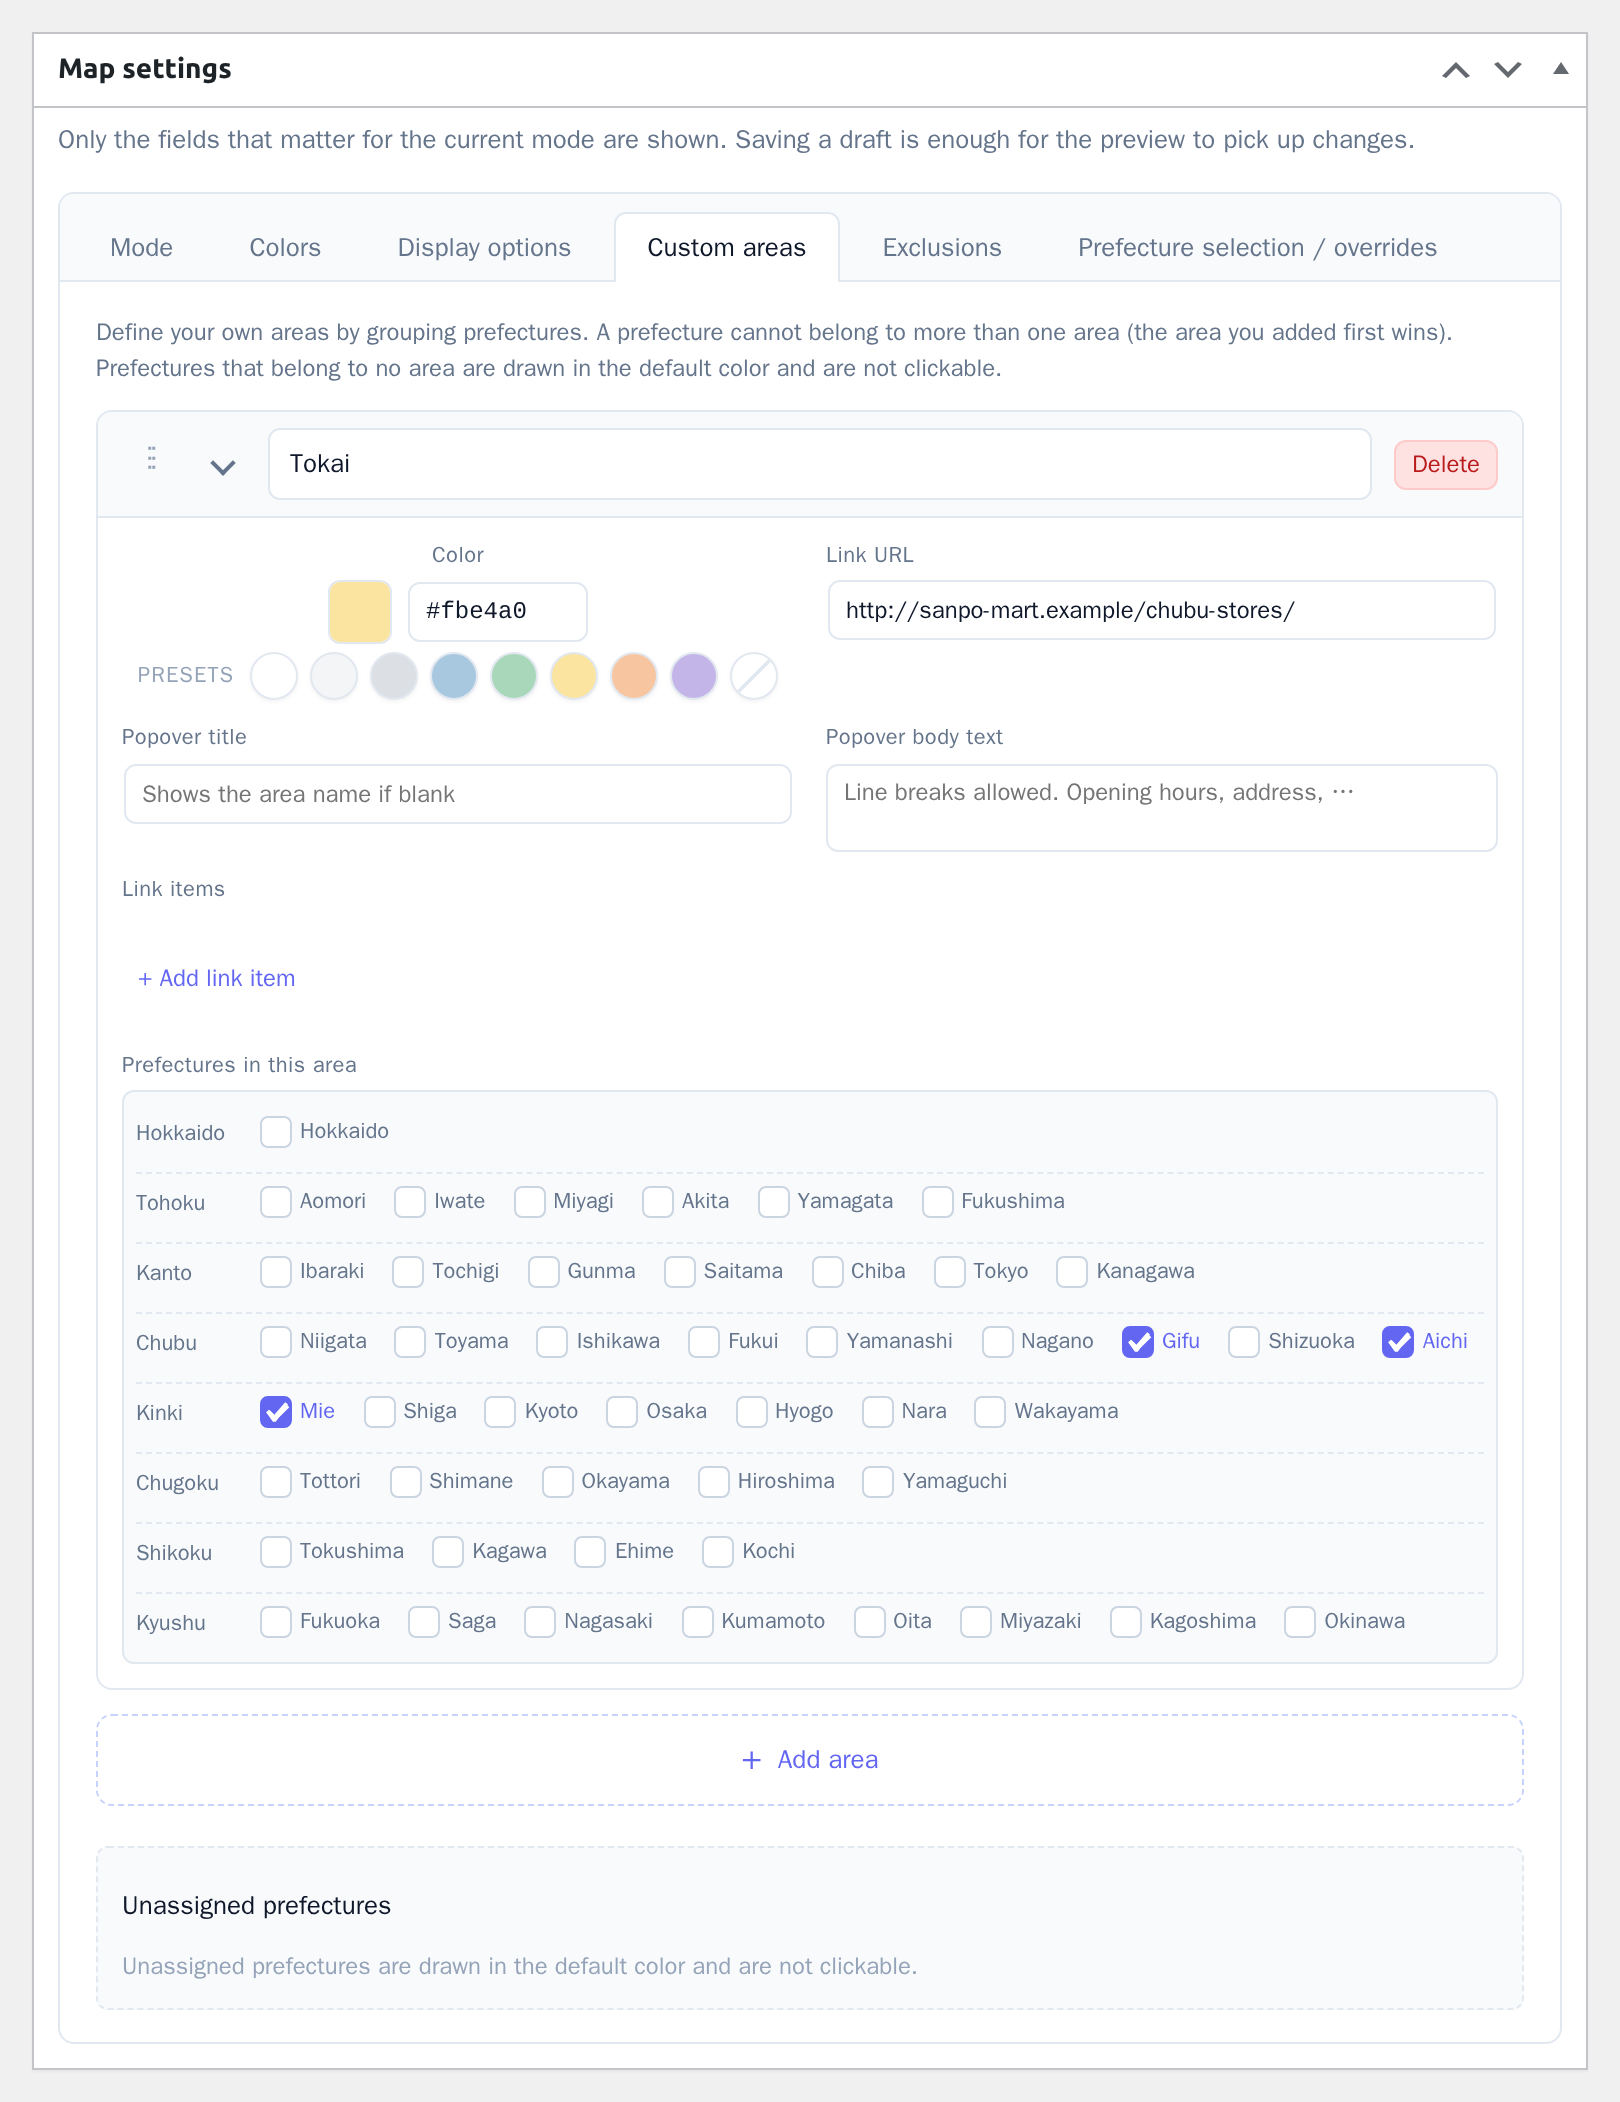
Build your own grouping — something like “Tokai (Aichi / Gifu / Mie)” — instead of the standard eight. The tab appears when you choose all of Japan → by region → Custom areas.
| Field | Notes |
|---|---|
| Area name | Required. A row saved with an empty name is discarded |
| Prefectures | A prefecture cannot belong to more than one area — the area you added first wins |
| Color | The fill for that area |
| Link | Where the area links to |
| Popover title / body / link items | Used when the map opens popovers |
Prefectures that belong to no area are drawn in the default color and are not clickable. The Unassigned prefectures list at the bottom of the tab shows which ones those are.
With custom areas, the clickable unit becomes the area. The per-prefecture links you set on the “Prefecture selection / overrides” tab are not used at all — set the destination on each area instead.
A prefecture that belongs to no area is also drawn in the default color even if you gave it a color override, so that it reads as outside every area. Color overrides on prefectures that do belong to an area work as usual.
Popover
Shown for standard eight regions + popover. Set a heading, body text and link items per region. Empty fields are not shown.
A region becomes clickable when it has a title, body text, link or link item, or when any prefecture inside it has a link. A region with neither is not clickable.
- Title — the region name is used if you leave it blank
- Body text — opening hours, an address, and so on. Line breaks are allowed
- Link items — as soon as you add one item, the popover lists those items. With none, it falls back to the per-prefecture URLs from the Prefecture selection / overrides tab (only prefectures that have a link are listed, and each item is labelled with its label override, or the prefecture name if there is none)
Region links
Shown for standard eight regions + direct link. Enter the URL each region links to. Regions left blank are not clickable.
For a region that has a URL, the region link wins over the per-prefecture URL overrides inside it. Regions with an empty URL fall back to those per-prefecture links.
Exclusions
Shown for all-of-Japan only. Prefectures you check here are left out of the drawing entirely, and the space they took is closed up.
- Zoom to fit the remaining area (default: on) — the prefectures left after exclusion are zoomed to fill the display area. With it off, the position and scale of the whole country are kept and the excluded parts become blank space
Okinawa is always hidden in the all-of-Japan view, so it is not listed here.
Prefecture selection / overrides
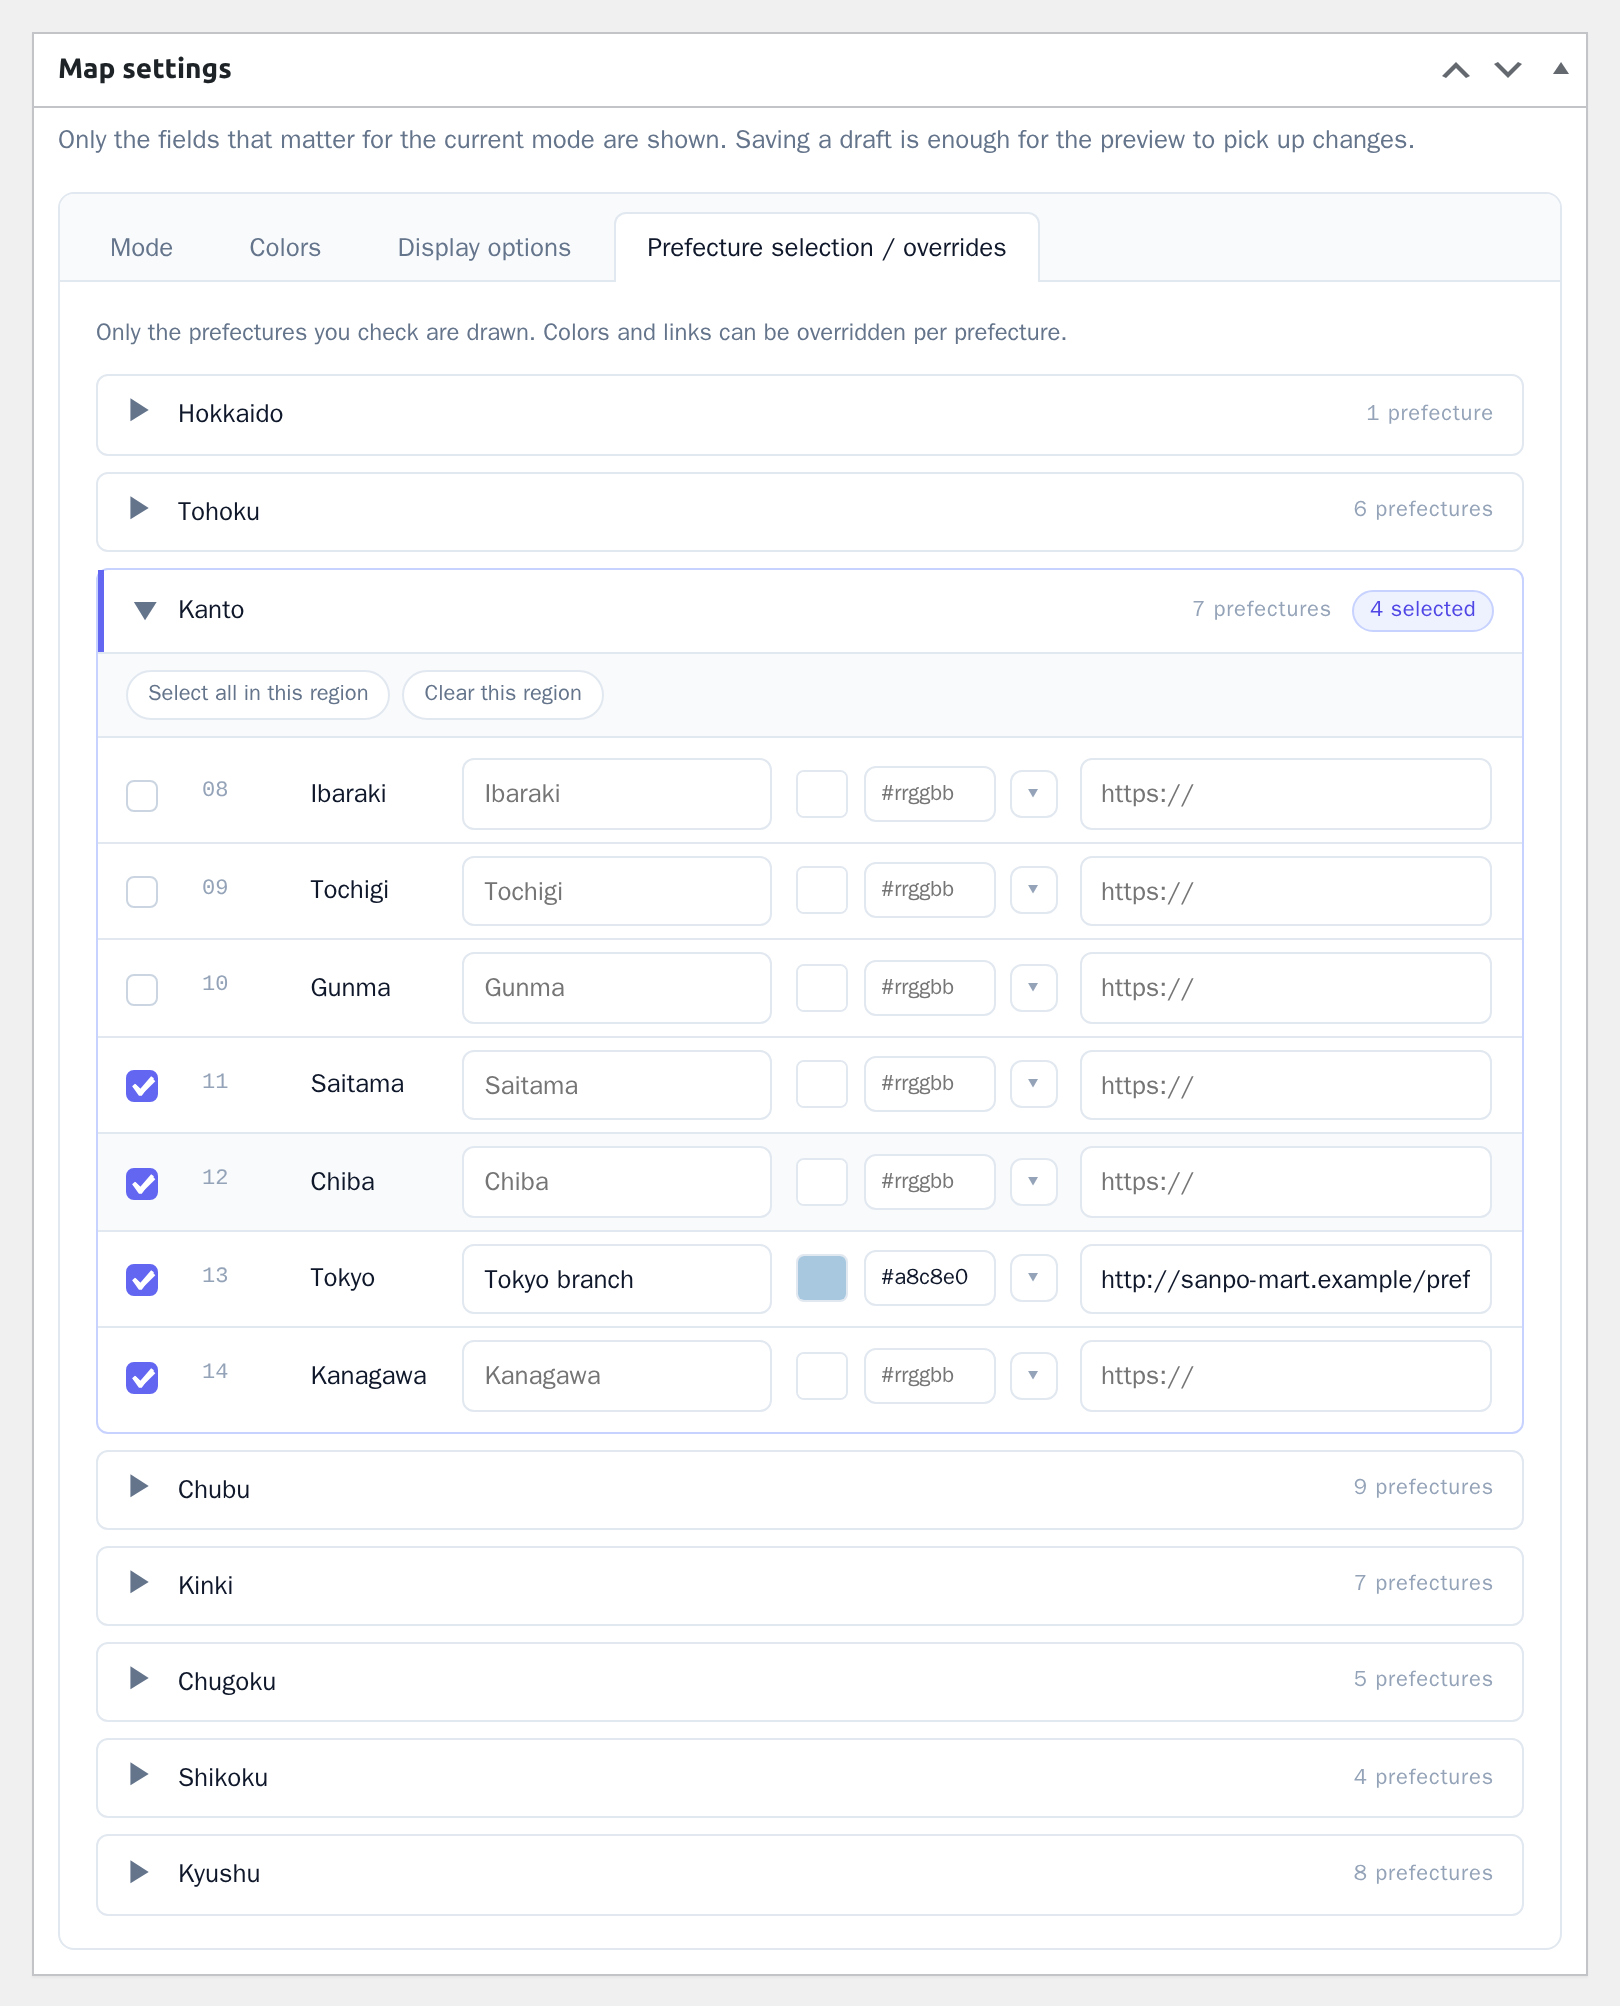
The 47 prefectures are listed in eight collapsible groups, one row each.
| Column | Notes |
|---|---|
| Checkbox | Whether the prefecture is drawn, when you are picking prefectures yourself |
| Code | Prefecture code (01–47). Read-only |
| Name | Prefecture name. Read-only |
| Label override | Replaces the drawn name and the screen-reader label. Up to 24 characters |
| Color override | Changes the fill for that prefecture only |
| Link override | Where that prefecture links to |
When you are picking prefectures yourself, each group also offers Select all in this region and Clear this region.
The label override is meant for business names such as “Tokyo branch”. It changes both the text drawn on the map and what a screen reader announces.
Whether these overrides actually apply depends on the mode you are in. Note in particular that link overrides are ignored when you use custom areas.
| Mode | Color override | Link override |
|---|---|---|
| Picking prefectures yourself / all of Japan + by prefecture | Applies | Applies |
| All of Japan + by region (standard eight, direct link) | Applies (wins over the region color) | Applies only where the region itself has no URL |
| All of Japan + by region (standard eight, popover) | Applies (wins over the region color) | Used as the link list inside the popover |
| All of Japan + by region (custom areas) | Applies only to prefectures inside an area | Not used — the area’s link is used instead |
Output size
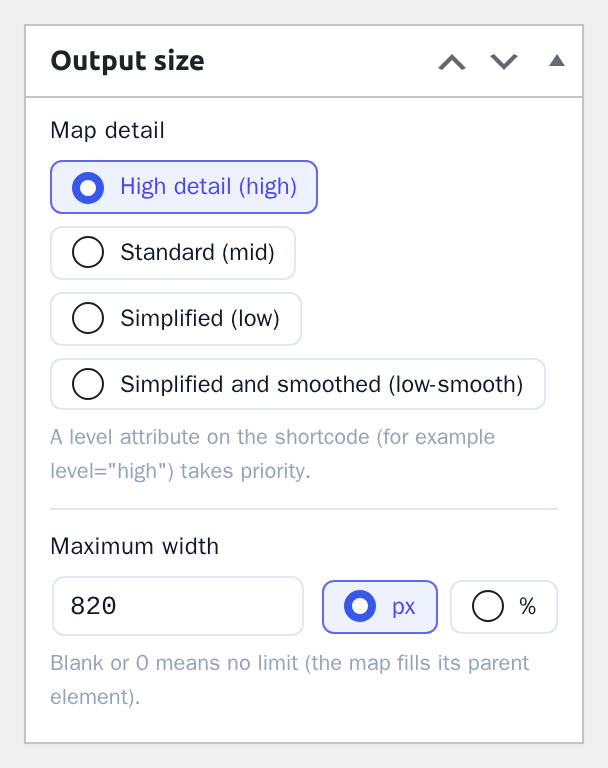
This box sits in the editor sidebar.
Map detail offers four levels of outline accuracy. Higher detail means a finer
coastline and a larger SVG. The default is high.
| Value | Label |
|---|---|
high | High detail (high) |
mid | Standard (mid) |
low | Simplified (low) |
low-smooth | Simplified and smoothed (low-smooth) |
Maximum width takes a number and a unit (px or %).
Blank or 0 means no limit and the map fills its parent element. Values are capped at 5000 px and
100 %.
A level attribute on the shortcode takes priority over the level chosen here.
Setting link targets
You can type a URL into any link field, or search your site and pick a target instead. The search covers public post types and public taxonomies, so posts, pages, custom post type entries and taxonomy terms are all available.
- A search returns at most 20 results. Add keywords if what you want is not listed
- Labels on popover link items are truncated to 60 characters
- Media attachments and the plugin’s own map post type are excluded from the search
A target picked through search is stored by ID and resolved to a URL every time the map is rendered, so the link survives later changes to your permalink structure or slugs.
Placing a map on a page
Two ways, producing identical HTML.
Shortcode
[plg_jcm_map id="123"]| Attribute | Default | Accepted values |
|---|---|---|
id |
none (required) | The map’s post ID. An ID that does not exist outputs nothing at all |
level |
the level saved on the map | low / low-smooth / mid / high |
class |
none | One CSS class, added to the wrapper |
[plg_jcm_map id="123" level="mid" class="my-map"]Any other value for level is silently ignored rather than raising an error, and the
level saved on the map is used.
Maximum width cannot be set from the shortcode — use the Maximum width field on the map itself.
Block
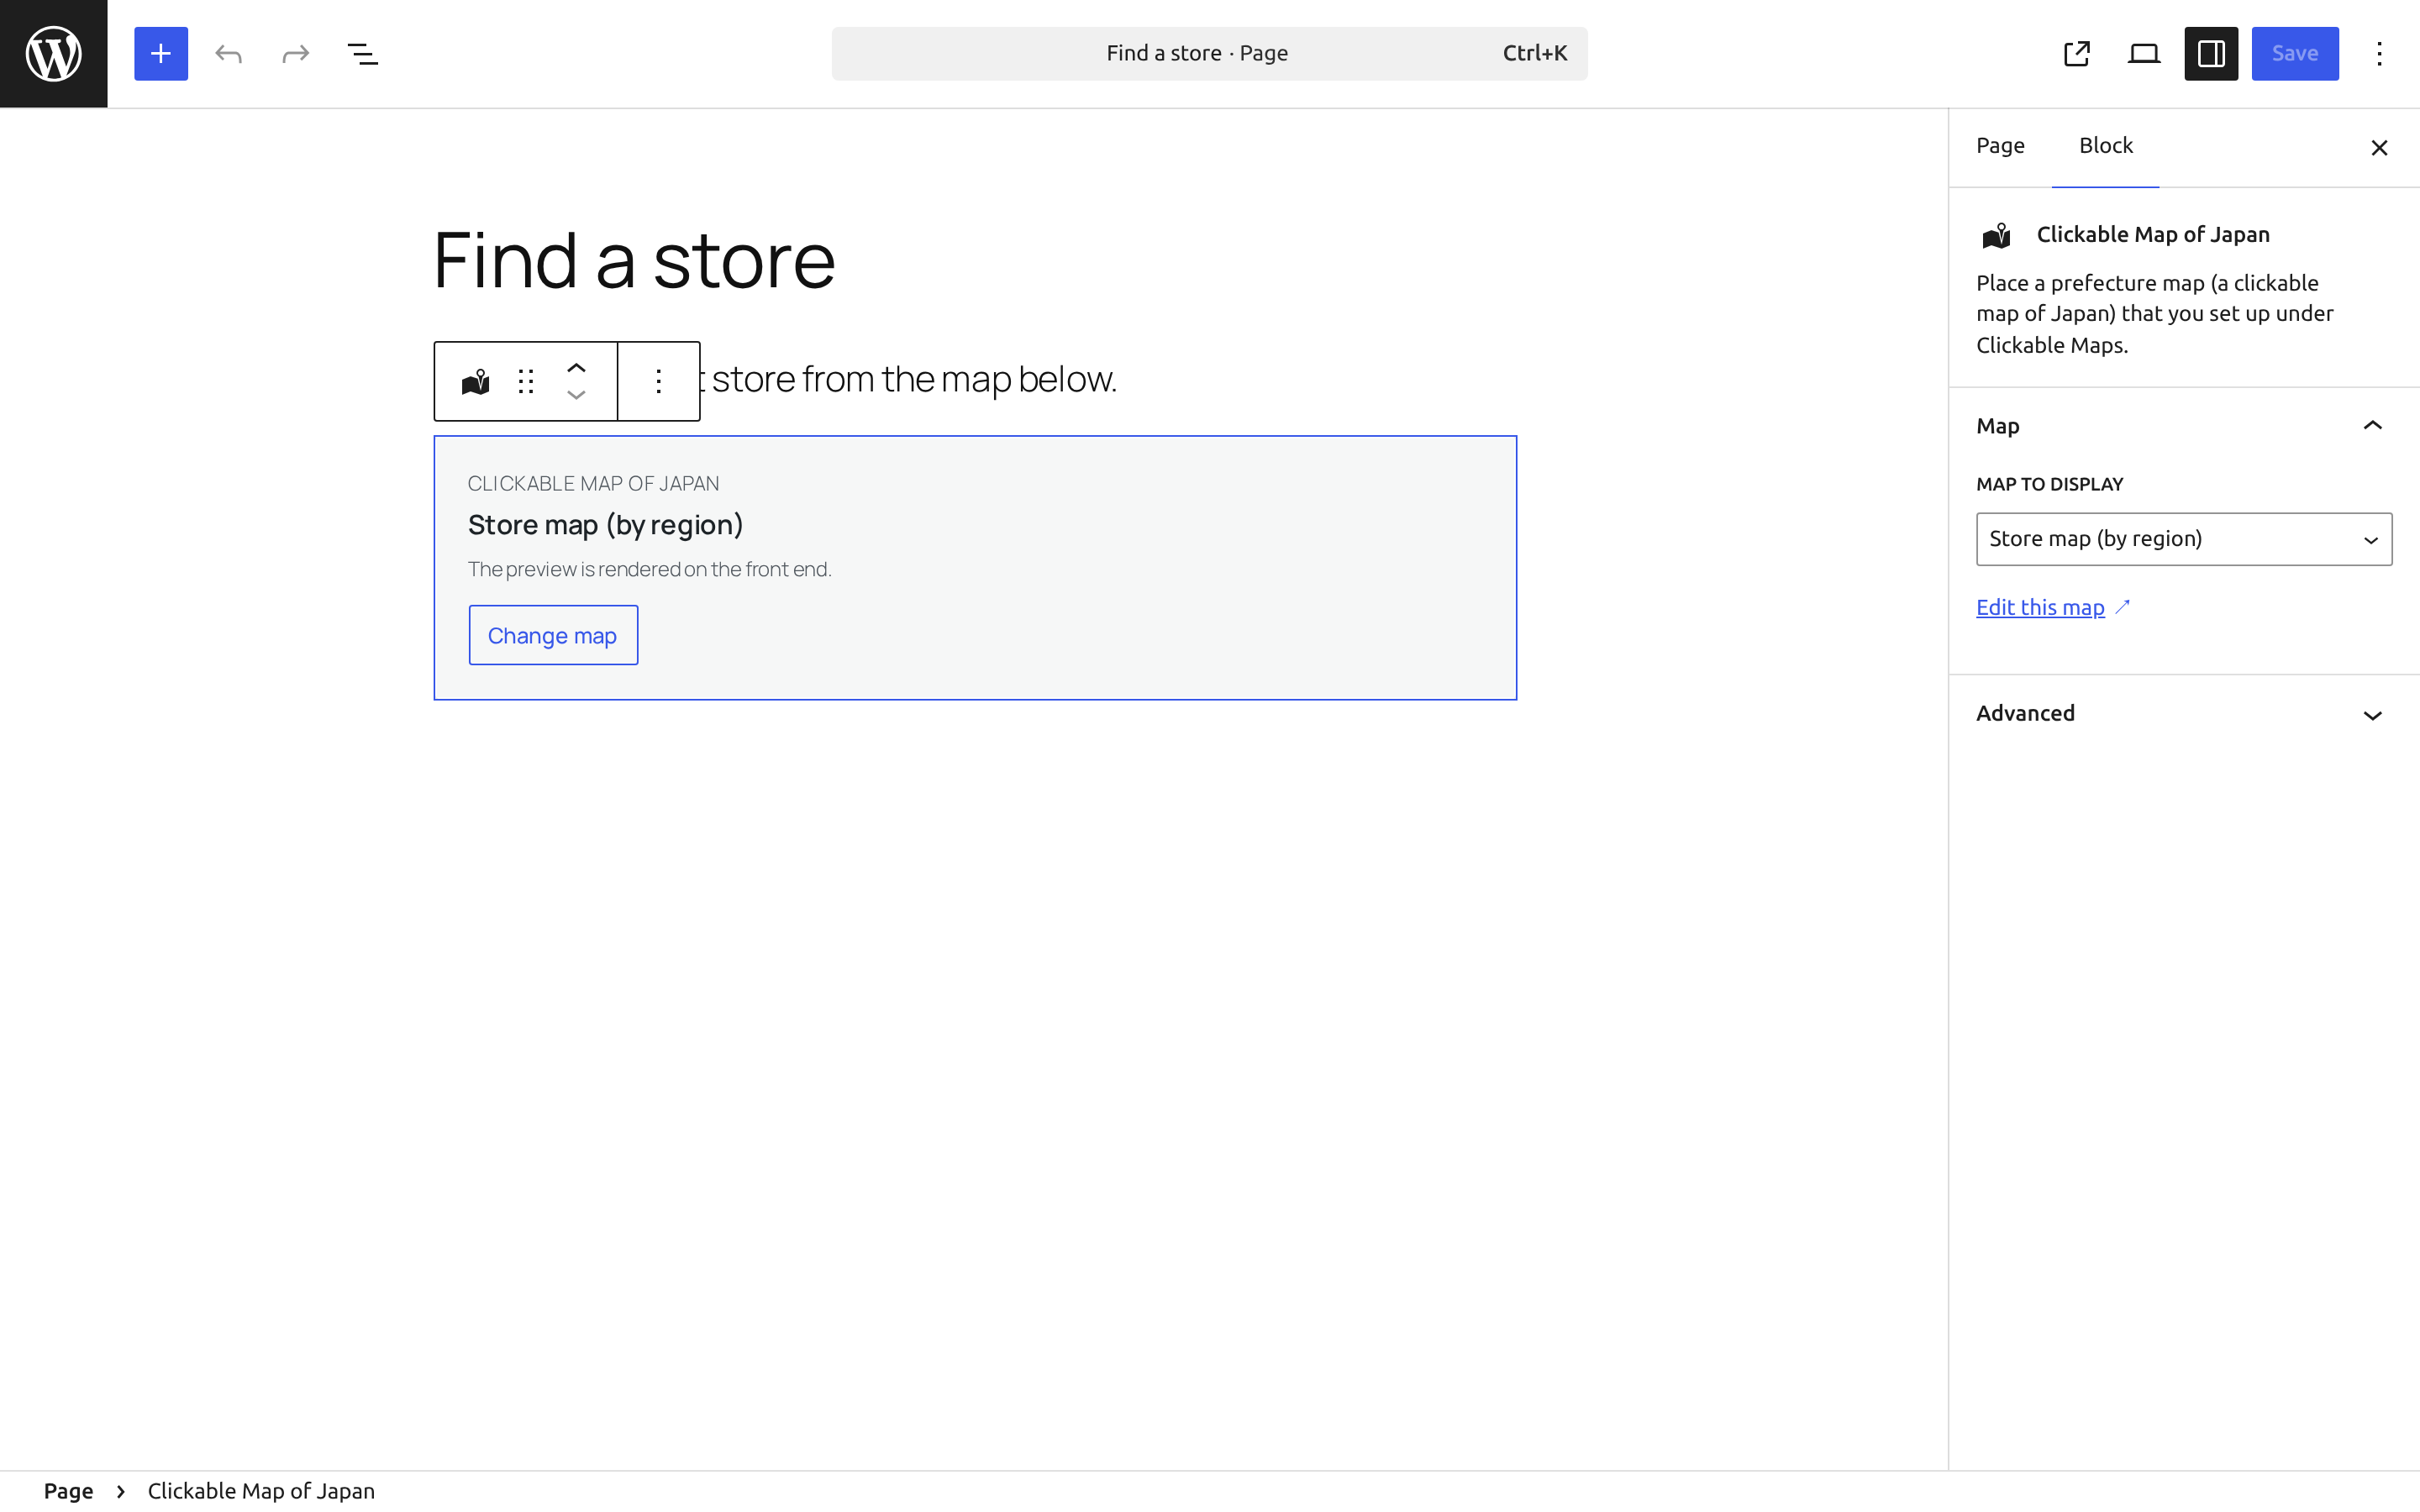
Insert the Clickable Map of Japan block and choose your map under Map to display in the sidebar.
The block stores only the map ID and renders on the server, so editing a map updates every place it is embedded.
The block has no equivalent of level or class. Use the shortcode if you
need to override the detail level or add a CSS class.
Checking the result
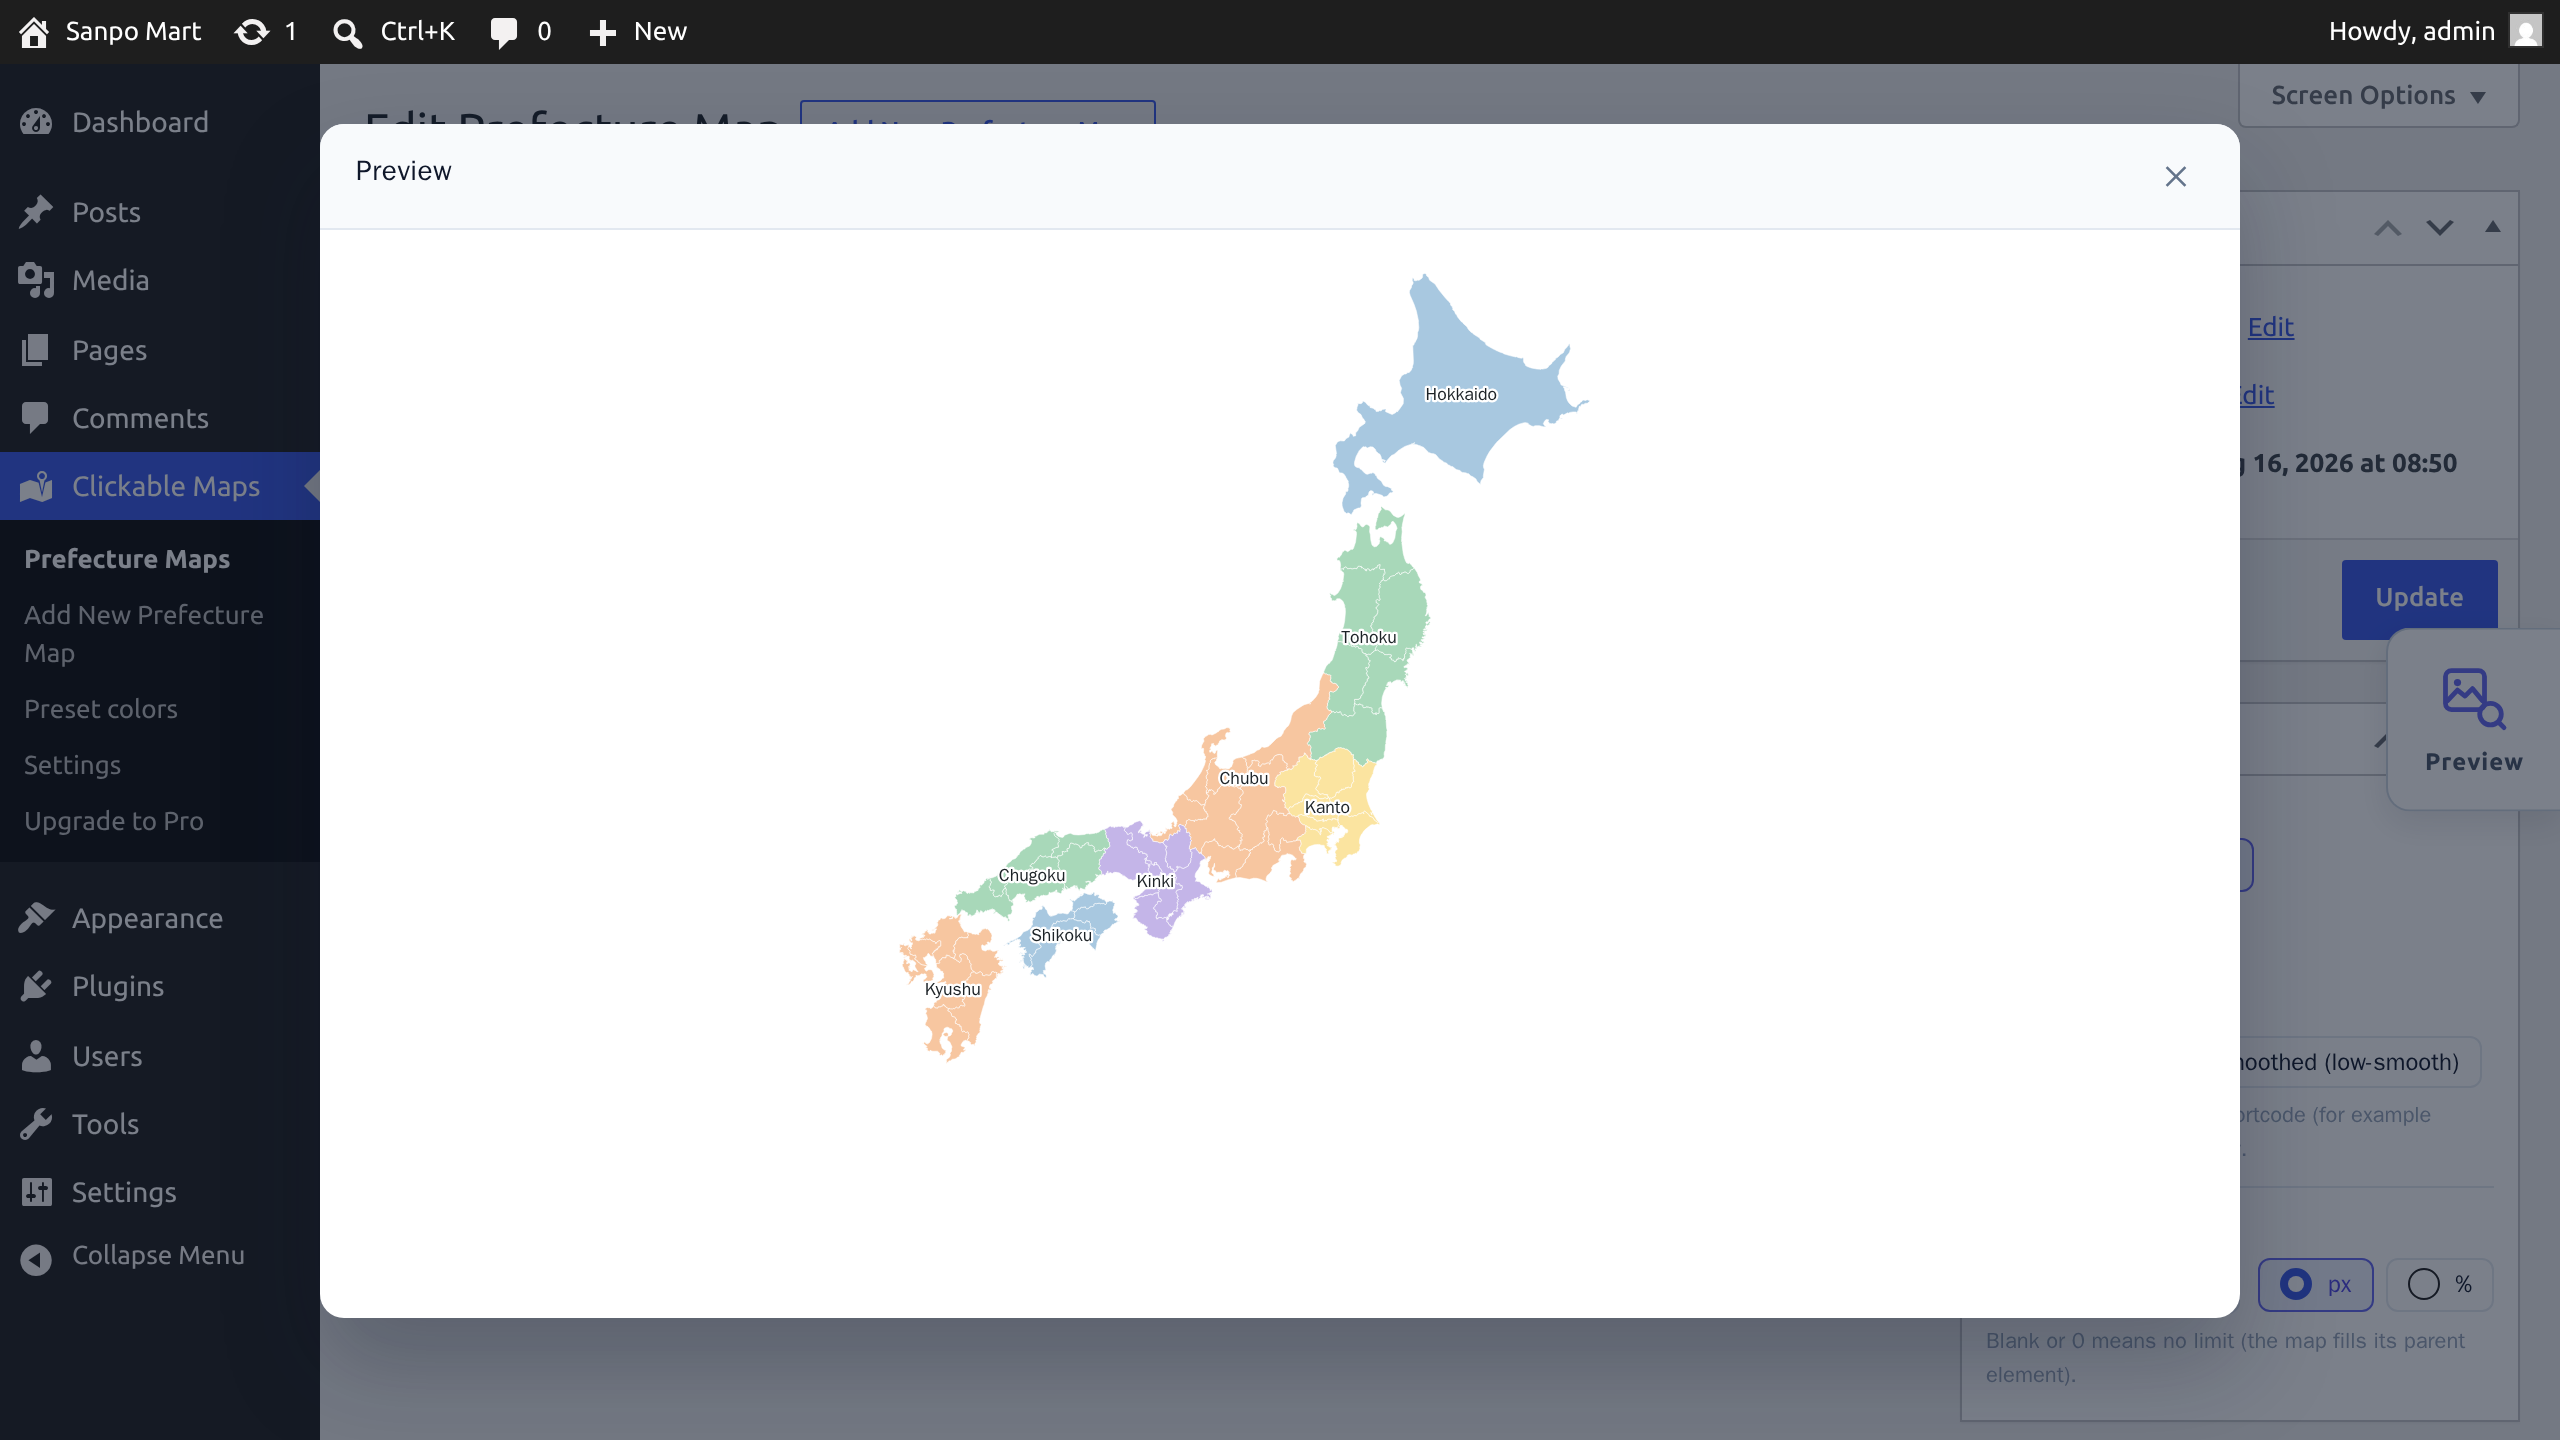
The map editor adds a floating preview button. Clicking it opens a modal that renders the map from what is currently saved.
Links inside the preview do not navigate. They are replaced with a note naming the destination, so you cannot lose unsaved edits by clicking one.
A preview cannot be built until at least one prefecture is selected.
Color presets and duplicating maps
Color presets
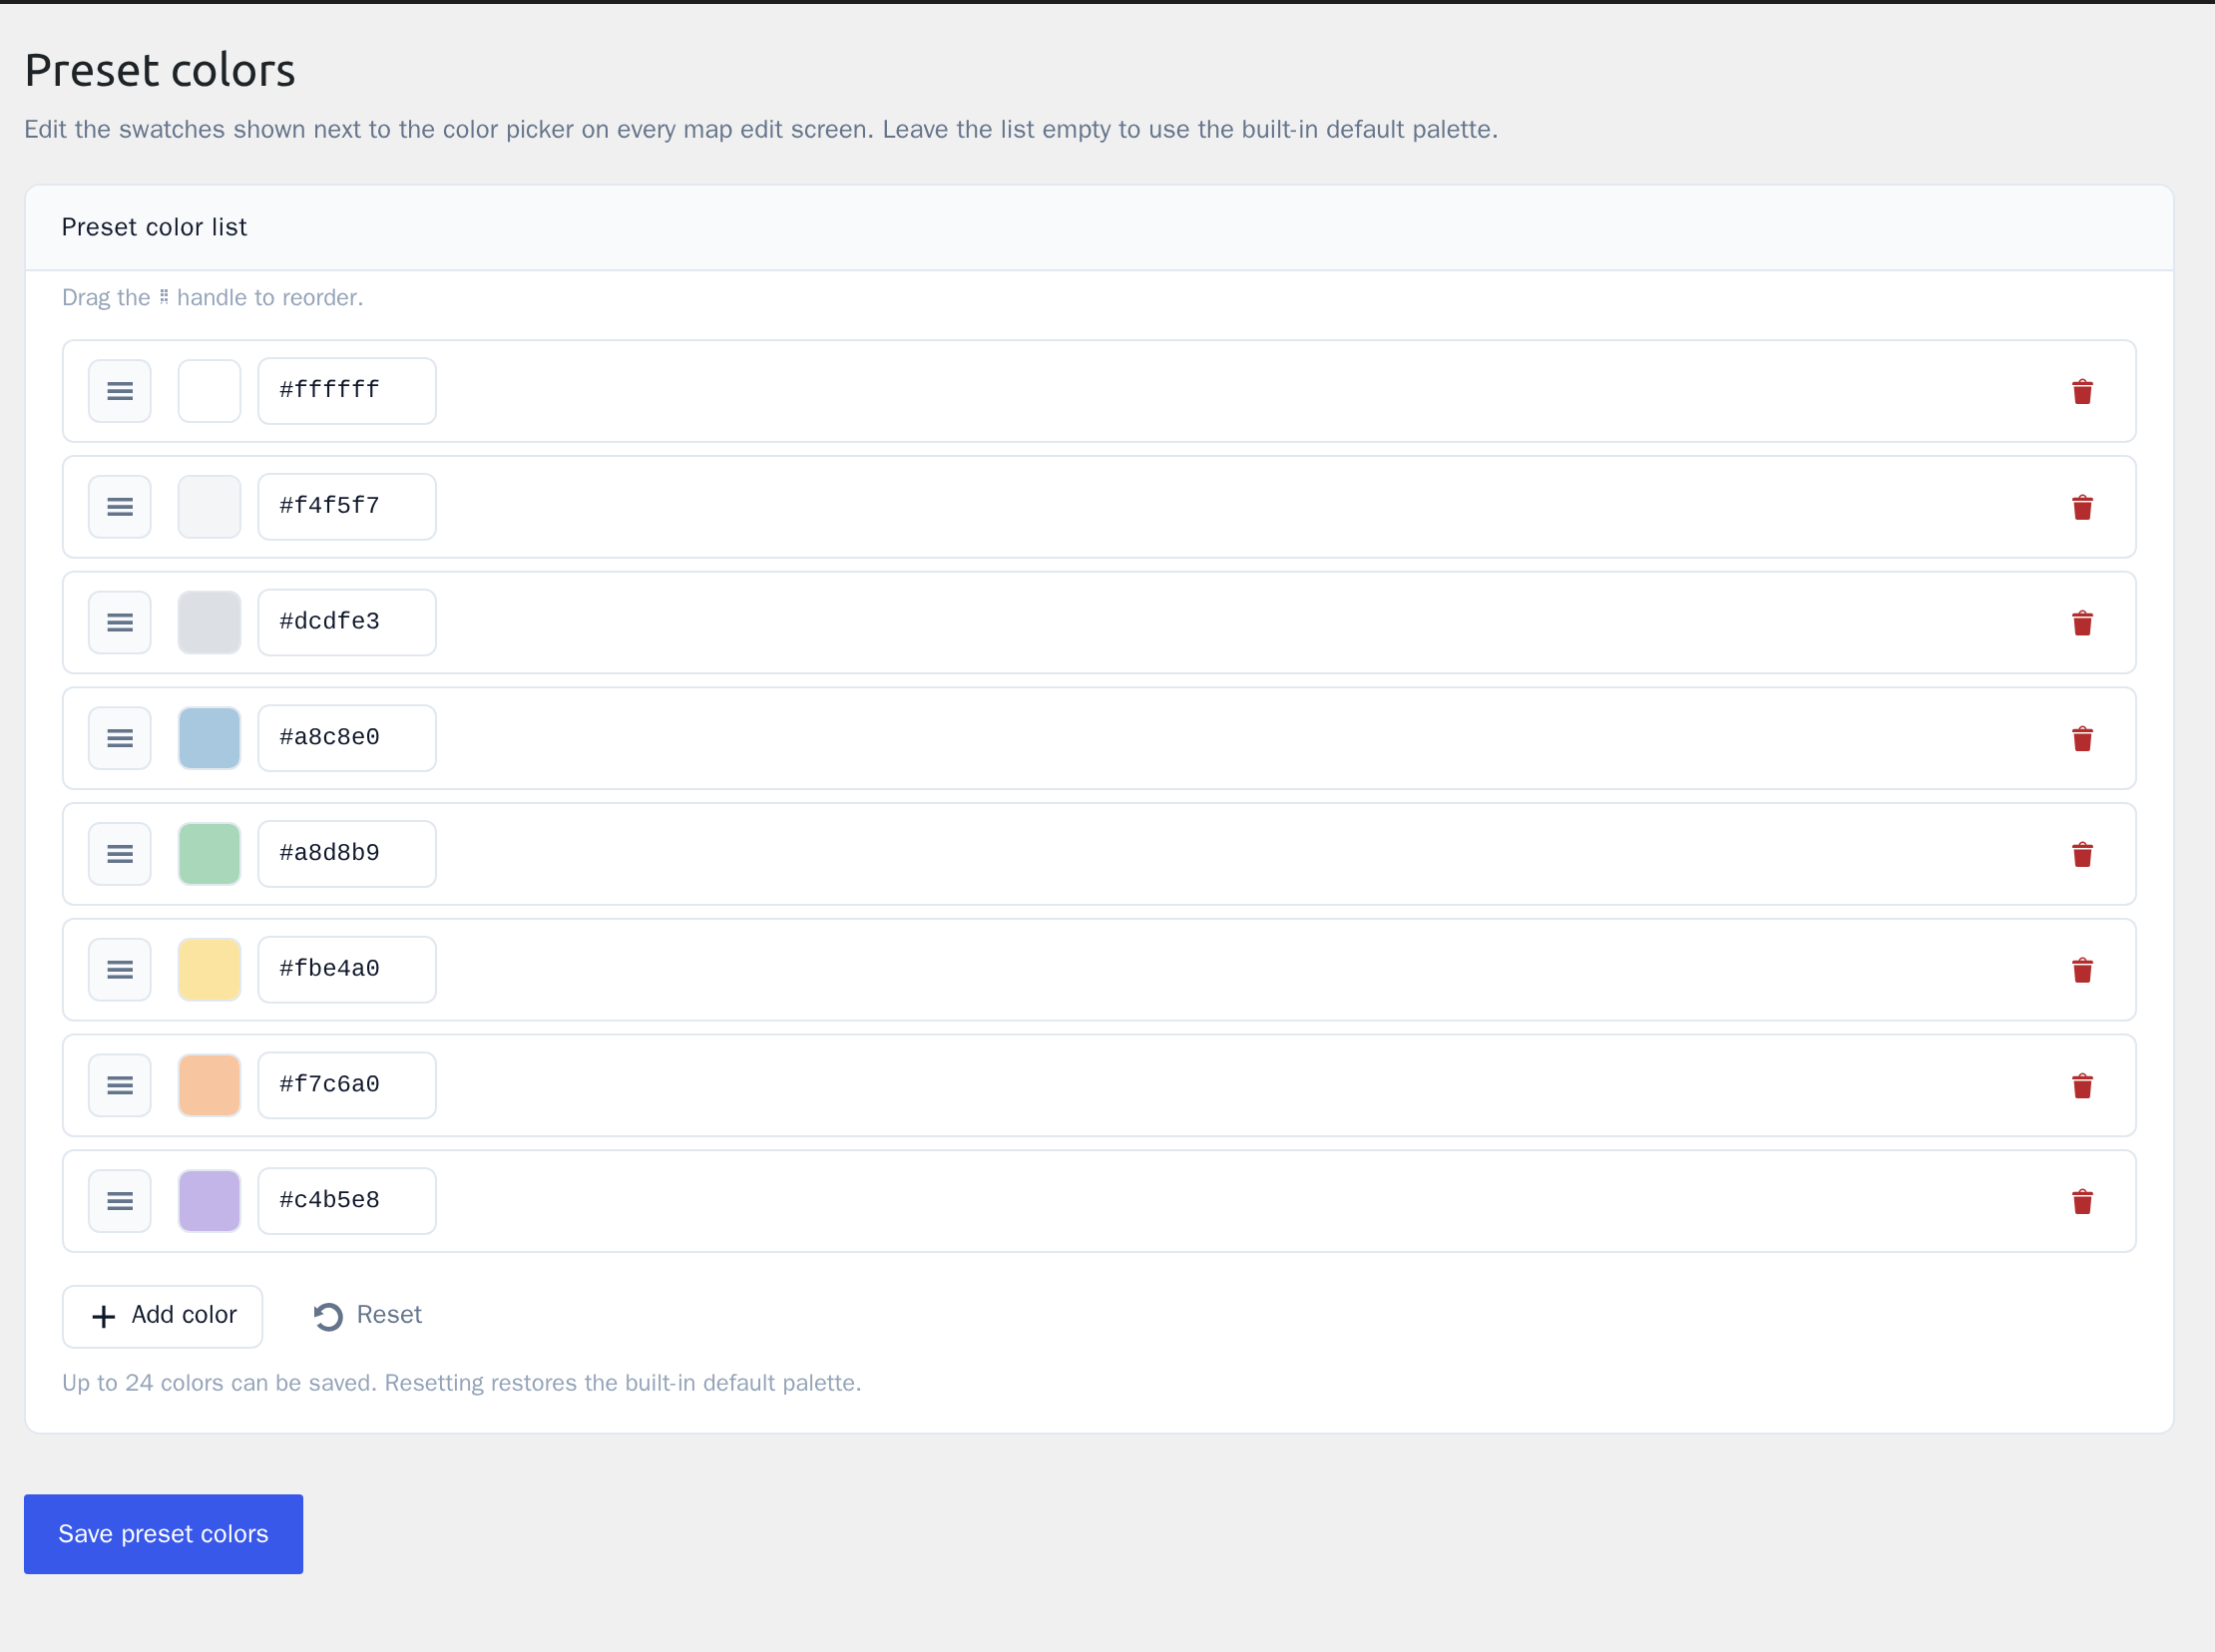
Clickable Maps → Preset colors edits the swatches shown next to the color picker on every map edit screen.
- Up to 24 colors can be saved
- Drag the ⠿ handle to reorder
- Reset restores the built-in default palette of eight colors
- Saving an empty list also falls back to the built-in palette
This screen requires administrator capabilities (manage_options).
Duplicating a map
Hovering a row in the map list reveals Duplicate. It copies the whole
configuration into a new map and appends (copy) to the title — useful when you need
several maps that share a palette or link structure.
Styling with CSS
A map is output like this:
<div class="jcm-map">
  <svg …>
    <path id="pref-13" data-pref-code="13" data-pref-name="Tokyo" fill="…" aria-label="Tokyo" />
    …
  </svg>
</div>
Add your own class with the shortcode’s class attribute, then target these selectors
from your theme’s CSS.
| Selector | Target |
|---|---|
.jcm-map | The wrapper around the map |
.jcm-map svg | The SVG itself |
path[data-pref-code="13"] | One prefecture (13 is Tokyo) |
a[data-region="kanto"] | One region, when grouping by region |
.jcm-labels text | Names drawn on the map |
.jcm-popover and friends | The popover (__title, __body, __list, …) |
For example, to change the hover fill of one prefecture:
.my-map path[data-pref-code="13"]:hover {
	fill: #4f46e5;
}
There is no CSS custom property API on the front end. Colors are written straight into the
SVG’s fill attribute from the map’s settings, so set your normal palette in the admin.
The color and typeface of names drawn on the map are baked into the SVG and cannot be changed with CSS.
The free edition exposes no PHP hooks (actions or filters), so the rendered output cannot be modified programmatically.
Accessibility
- Clickable areas are real
<a>links carrying anaria-labelwith the prefecture or region name - A label override replaces what a screen reader announces
- Prefectures without a link are inert and are not focusable, and the cursor does not change — nothing looks clickable when it is not
- Regions that open a popover carry
role="button"andaria-expanded
Settings and uninstalling
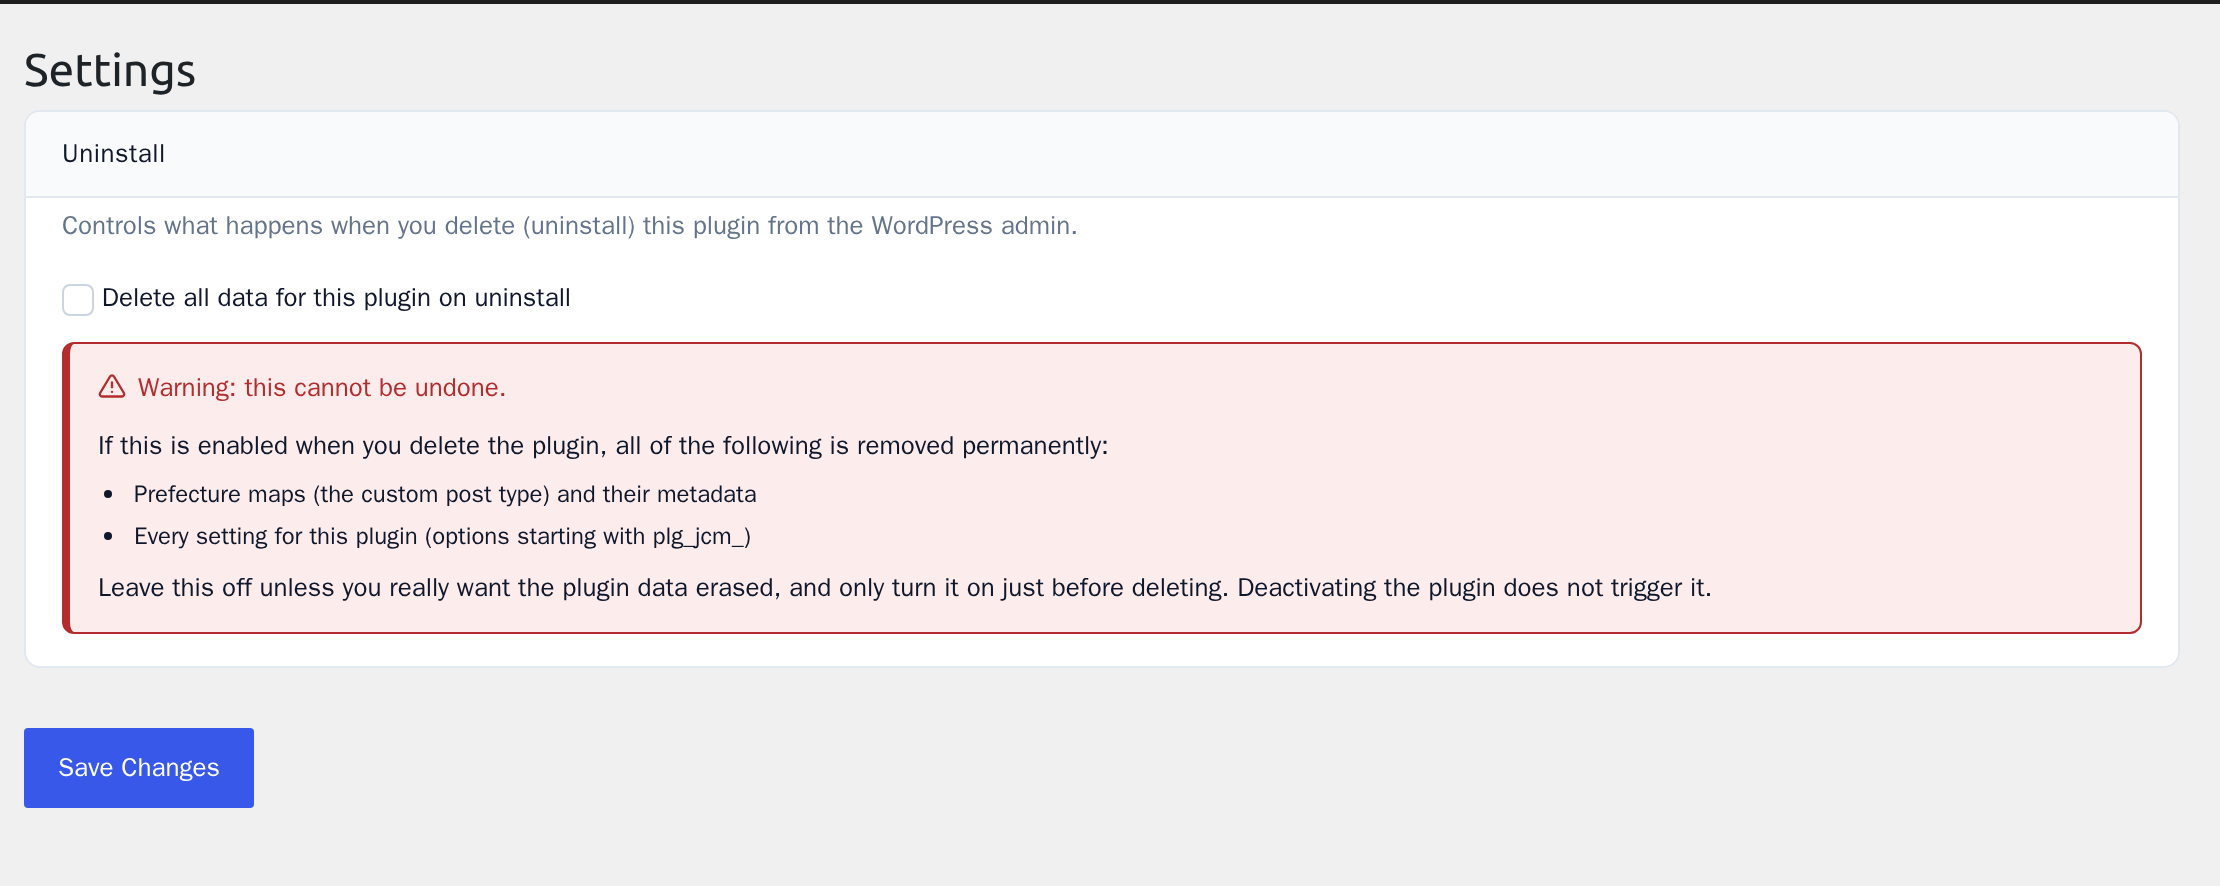
Clickable Maps → Settings holds exactly one setting: Delete all data for this plugin on uninstall, off by default.
Delete the plugin with it off and your maps and settings stay in the database — reinstalling picks up exactly where you left off.
Delete it with the setting on and the following is removed permanently:
- Prefecture maps (the custom post type) and their metadata
- Every setting for this plugin (options starting with
plg_jcm_)
This cannot be undone. Deactivating the plugin does not trigger it — the setting is meant to be switched on immediately before you delete.
The free and paid editions share the same storage. If you are moving from free to paid, leave this setting off when you remove the free edition.
Map data and attribution
The bundled maps are derived from the National Land Numerical Information (Administrative Zones Data, N03) published by Japan’s Ministry of Land, Infrastructure, Transport and Tourism, using data as of 1 January 2024.
The terms are the Japanese Government Standard Terms of Use (version 2.0), which are compatible with CC BY 4.0. Modification, redistribution and commercial use are permitted as long as the source is credited.
Crediting the source is your responsibility as the site owner. Put the attribution somewhere visible on any page that displays a map — a footer or a caption is fine.
「国土数値情報(行政区域データ)」(国土交通省)
(https://nlftp.mlit.go.jp/ksj/gml/datalist/KsjTmplt-N03-v3_1.html)を加工して作成
The credit is conventionally given in Japanese, as above. Processing applied to the original data: administrative polygons dissolved into prefecture outlines, reprojection to Web Mercator (EPSG:3857), Okinawa moved into an inset, vertex simplification, conversion to SVG, and the addition of identifying attributes.
Troubleshooting
The shortcode outputs nothing
If no map exists with the given id, the shortcode outputs nothing rather than raising
an error. Check the number against post= in the map’s edit screen URL. Draft maps render
only for users who can edit that map.
A prefecture is not clickable
Prefectures with no link target are deliberately rendered inert. If you are grouping by region, remember that a region’s link takes priority over the per-prefecture links inside it.
A prefecture is missing from a custom area
A prefecture can only belong to one area, and the area added first wins. Also note that an area row saved with an empty name is discarded entirely.
The map is too wide or too narrow on mobile
The SVG scales to its parent element. Set Maximum width on the map, or add a class
with the class attribute and size it in your theme’s CSS.
Still stuck
Please use the WordPress.org support forum, linked at the top of this page.
Free edition vs paid edition
Everything documented on this page is available in the free edition, and there is no limit on how many maps you can build.
| Feature | Free | Paid |
|---|---|---|
| Prefecture maps | Unlimited | Unlimited |
| Custom areas (group prefectures however you like) | Yes | Yes |
| Municipality maps (cities, towns and wards as clickable areas) | — | Yes |
| Municipality areas grouped across prefecture borders | — | Yes |
| Automatic updates and license management in wp-admin | — (updates come through WordPress.org) | Yes |
| Bug reporting from the dashboard | — | Yes |
| PHP hooks for developers | — | Yes |
If you need clickable areas at city, town and ward level, look at the paid edition. There is also a Clickable Maps → Upgrade to Pro screen in the admin.
The paid edition is sold on a Japanese-language site, and its documentation is in Japanese.